I own four Kallax units. Four. One is sideways in my bedroom acting as a nightstand. One holds Biscuit’s toys, his leashes, and approximately 40 tennis balls he’s never once played with. The other two I stacked in the living room because I refused to spend $800 on a TV console when IKEA exists. Total spent: $179. And honestly? That wall is the best thing in my house.
If you’ve ever stood in the IKEA Kallax aisle feeling overwhelmed by the configurations, I’ve done the research (and made the mistakes) so you don’t have to. Further down I’ll show you how to Use It as a Room Divider in a studio, a full pantry setup, a nursery system that actually grows with the baby, and a closet hack that doubled my hanging space. The good stuff starts right below.
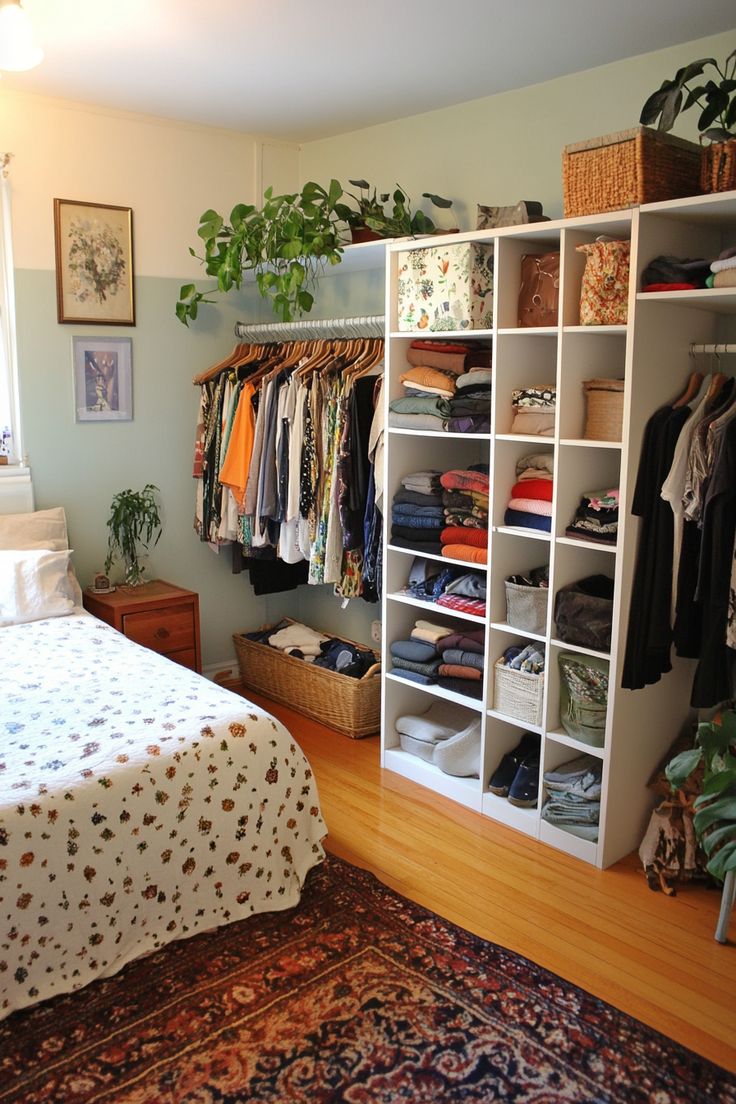
Use Kallax as a Room Divider (This One Changed Everything for Me)
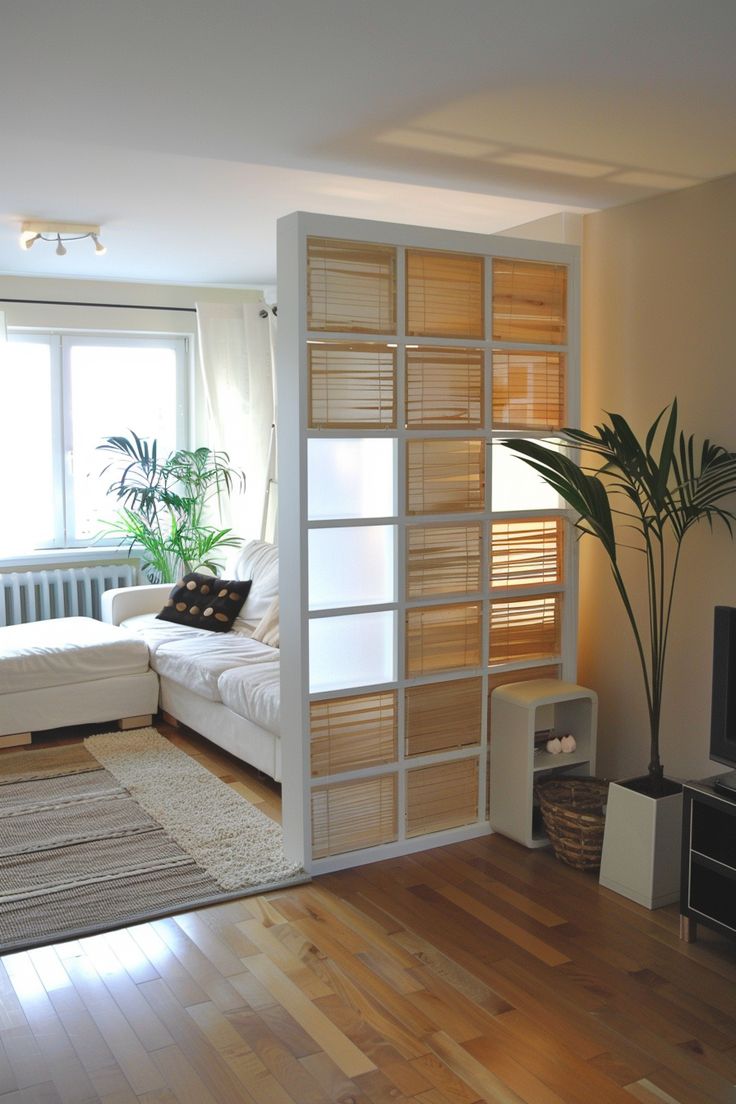

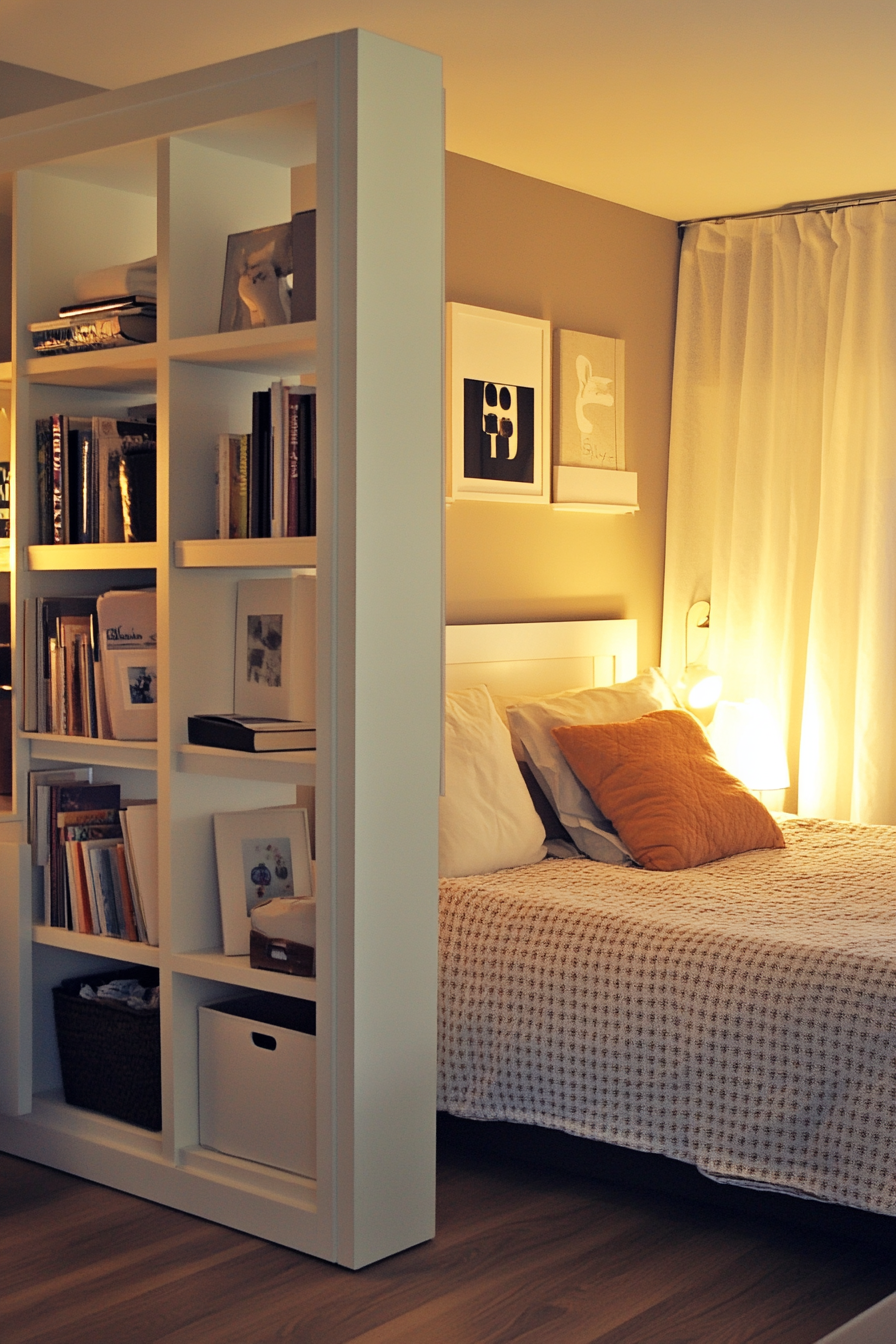
This is the use I tell every single person about first. The Kallax doesn’t just sit against a wall — it stands in the middle of a room and becomes architecture. No drilling, no permits, no contractor. Just a shelf doing its best impression of a wall.
Got an open-concept living and dining area that feels like one giant blob of space? Slide a 4×4 Kallax right between the two zones. You still get the light, you still get the flow, but suddenly each area has its own identity. Style the dining-side cubbies with baskets and wine bottles. Style the living-side with books and a trailing pothos. Same shelf, two completely different personalities.
Studio apartment people, this is especially for you.
A Kallax between your bed and your living space gives you that tucked-away, sleeping-nook feeling without actually walling yourself in. I’ve seen people do this with a 2×4 unit placed horizontally — it hits right around 30 inches tall, low enough to not feel suffocating, high enough to create a visual boundary. Tuck your alarm clock, a little reading lamp, and a candle in the cubes facing the bed. Instant headboard situation.
Want more privacy on the bed side? A tension rod inside one of the cubes plus a piece of linen fabric does a lot of work for about $8.
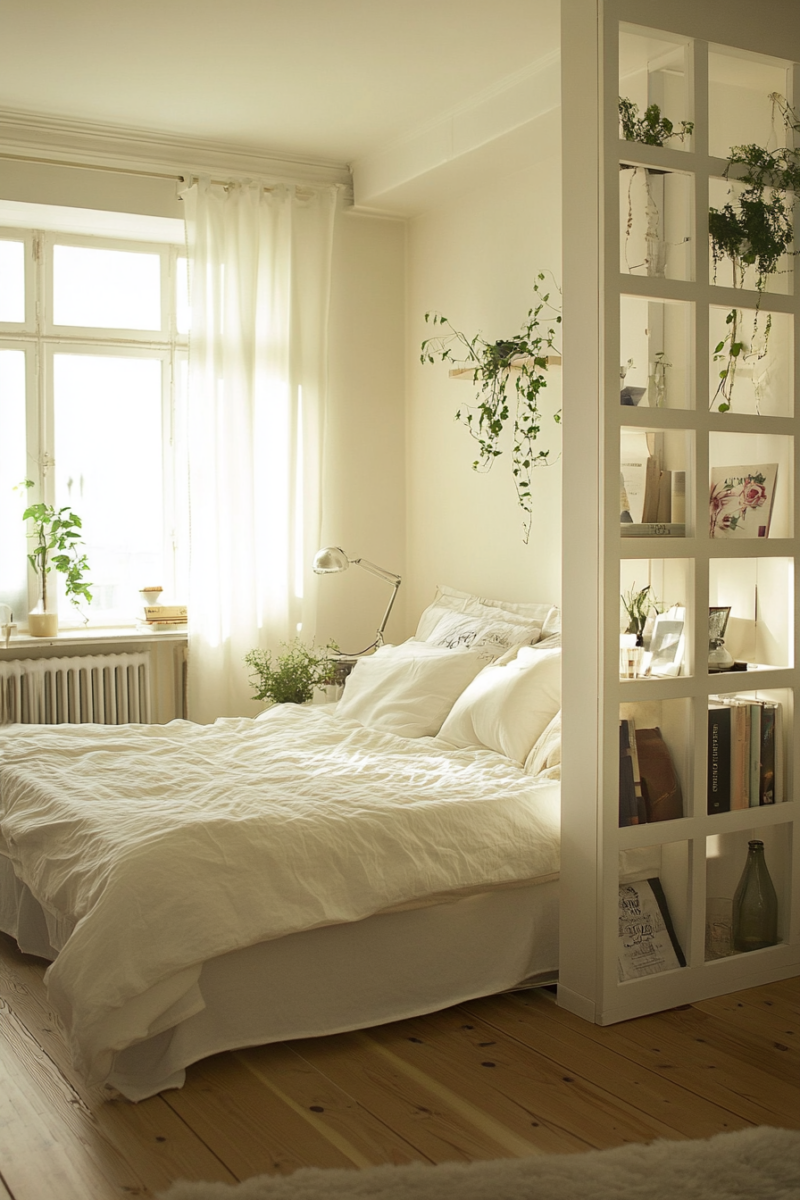
And plant parents — okay, hear me out. A Kallax divider filled with plants is genuinely one of the most beautiful things I’ve ever seen in a small apartment. Fill every open cube with something green. Pothos, snake plants, a monstera if you’re feeling dramatic. It divides the space AND it’s basically living wall art. The light-filtering effect on the other side is so soft and good.
One more divider trick that blew my mind: two Kallax units placed back-to-back in a walk-in closet. Each person gets their own side. No more “whose shoes are whose” arguments. (My partner and I have been doing this for two years and it has genuinely saved us from at least a few minor disagreements.)

The back-to-back setup works because you remove both back panels and face the open sides outward. Each side is its own little closet. You can even choose different insert colors for each side if one of you is a maximalist and one of you is not. Not naming names.
Living Room Entertainment Unit That Doesn’t Look Like a Dorm Room
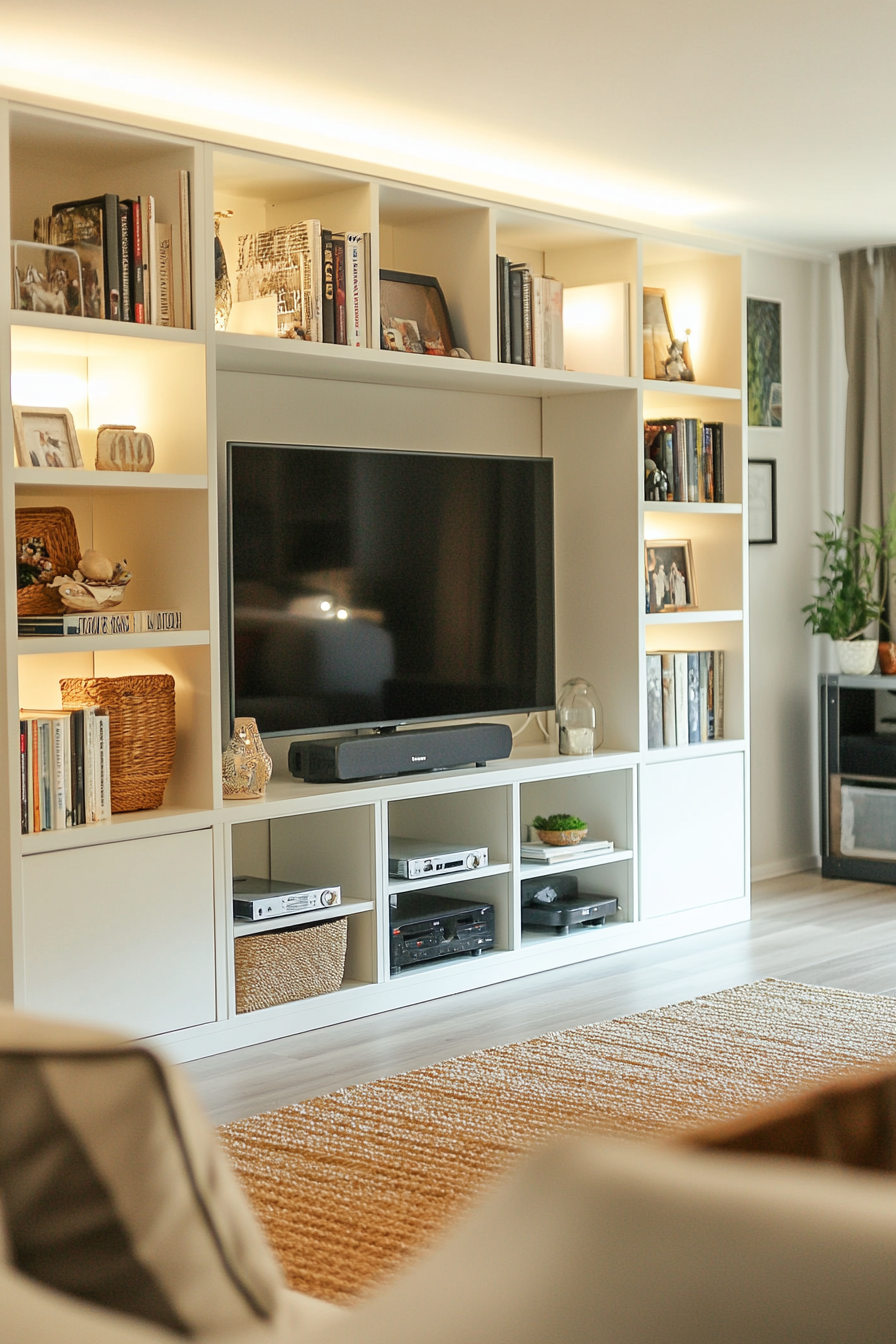
I’m going to be honest — when I first built my Kallax TV console I was worried it would look cheap. It does not look cheap. It looks intentional, which is the thing we’re always going for, right?
The trick is combining two or more units side by side and being smart about what goes where. Here’s what actually works:
- Center cubbies at TV height: leave these fully open for the TV itself and any soundbar. No inserts, no doors.
- Cubbies flanking the TV: these are your media homes. Use the IKEA Kallax door inserts to hide gaming consoles, cable boxes, DVD players, all that stuff that looks messy. The push-open doors mean no hardware visible on the front.
- Top cubbies: open shelves, styled. A few books, a plant, maybe a candle or a framed photo. This is your personality zone.
- Bottom cubbies: closed storage with drawers. Remotes, controllers, charging cables, the things you need constantly but don’t want to see.
I stacked a 2×4 on top of a 4×4 for my setup — the taller unit on the bottom anchors it visually. The whole thing cost me around $140 total and looks like something from a room in a design magazine. Not even being dramatic.
One thing I’d suggest: stick to one finish throughout. I tried mixing a white unit with a birch unit because I thought it would look “eclectic.” It looked like a mistake. Same color, consistent look. You can add personality through what you put IN the cubbies, not by mixing the unit colors themselves.
Kids’ Toy Organizer (That Kids Will Actually Use)
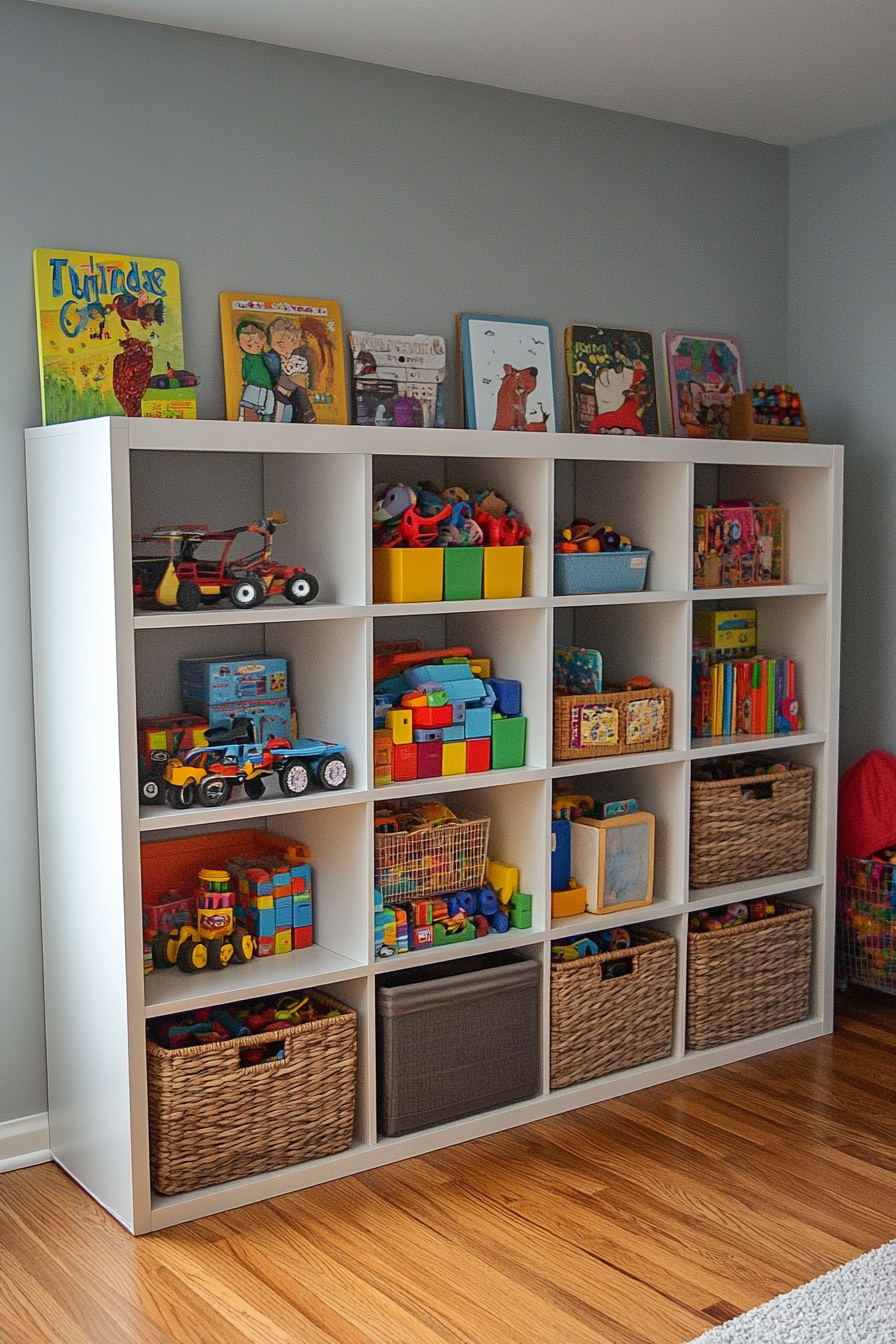
Every parent I know has a toy organization system that works for about four days and then collapses. The Kallax is different, and I think it’s because the cubbies are the right size — not too deep, not too shallow, and big enough that kids can actually see what’s inside.
The combo that works best is open cubbies for the things they use every day, closed cubbies (with the door insert) for the stuff that’s For special occasions or has a lot of small pieces. Board games with 47 tiny components? Closed cubby. Favorite stuffed animals? Open cubby at kid height.
A few specific things that work really well:
- Label each open cubby with a picture label, not just a word. Younger kids can actually follow picture labels and it makes cleanup feel like a matching game.
- Use fabric bins in the open cubbies for loose small toys — LEGO, Hot Wheels, crayons. Dump and done. The whole bin comes out and goes back in.
- Reserve one full cubby just for books, with a small bookend to keep them upright. My niece has this setup and she actually browses her books now because she can see the spines.
- Keep the bottom row of cubbies accessible to the child. Everything at their height is their responsibility. Everything above is yours.
This also grows with them, which is one of the best things about the Kallax. The same unit that held diapers and swaddle blankets in the nursery becomes the LEGO station at age five and the bookshelf-slash-desk organizer at age ten. You’re not buying new furniture every few years. You’re just rearranging what’s already there.
Mudroom Storage and Bench (The Entryway Hack I Wish I’d Done Sooner)
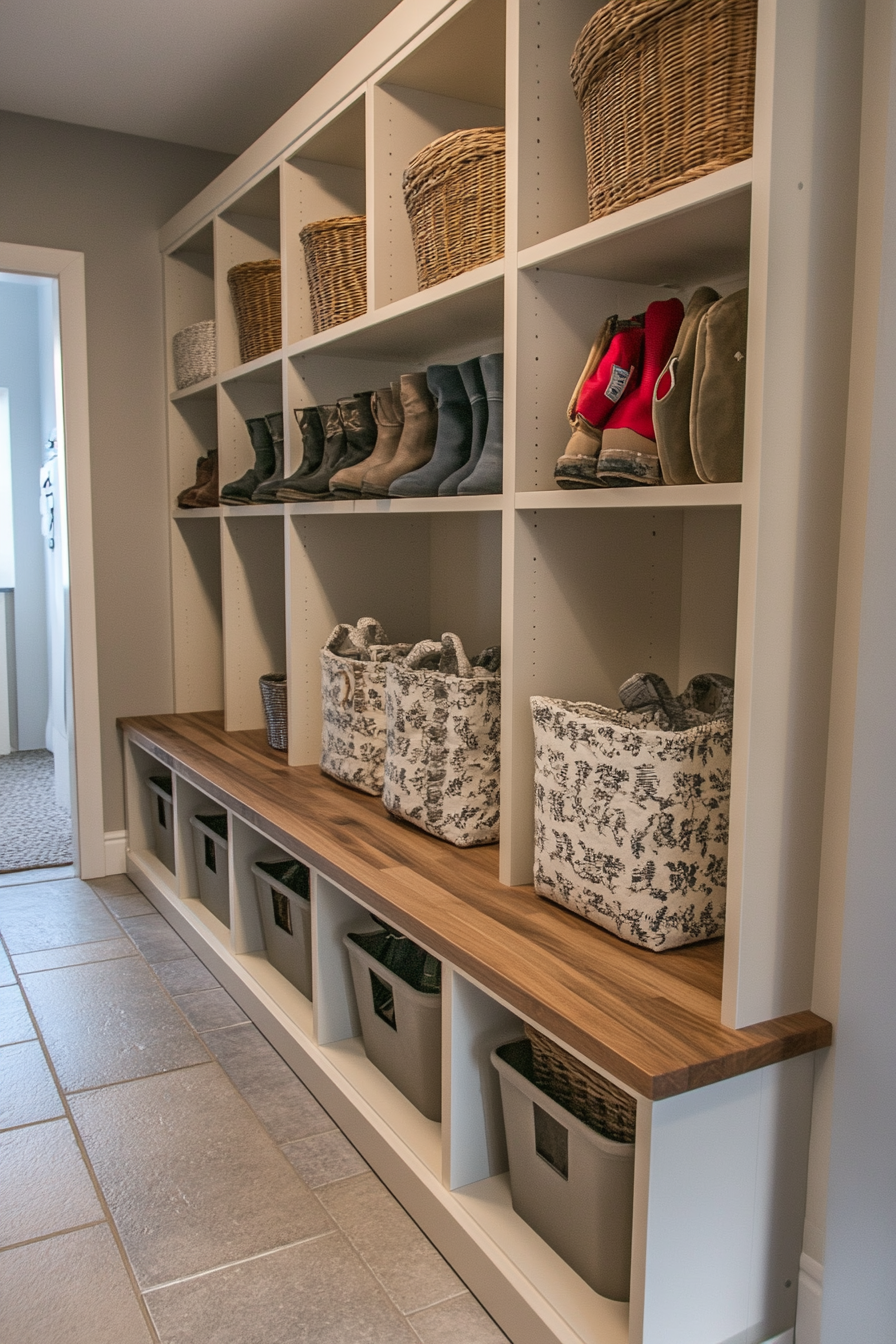
My entryway used to be a disaster. Shoes everywhere, Biscuit’s leash on the floor, bags on the floor, coats on the floor. Everything was on the floor. And I had a coat rack! It just didn’t help.
The Kallax bench setup fixed it. Here’s how it actually works:
You place the unit horizontally against the wall (so it’s low and wide, like a bench). Remove the back panel. Now you can slide shoes directly into the open cubbies from the bench seat. No more shoe pile. The bench top becomes a place to actually sit and put on your shoes, which sounds basic but genuinely changes the morning routine.
Above the Kallax, add wall hooks for coats. The IKEA BROR hooks or even basic Command strips work fine here. You want them at a height that’s comfortable for everyone in your household — remember to put a lower hook for kids if you have them.
For the cubbies themselves:
- Closed cubbies: hats, scarves, mittens, dog leashes, sunglasses, the random stuff that ends up everywhere
- Open cubbies: one per person, with a labeled fabric bin for their stuff
- One dedicated cubby for bags and backpacks (keep the back panel removed on this one so bags can hang out the back if needed)
Top the whole thing with a thin cushion (I found a 24×24 inch foam cushion at a fabric store for about $15 and covered it in outdoor fabric so it wipes clean) and it actually looks intentional and not like a storage unit from a big-box store.
Kitchen Pantry Storage That Actually Makes Sense
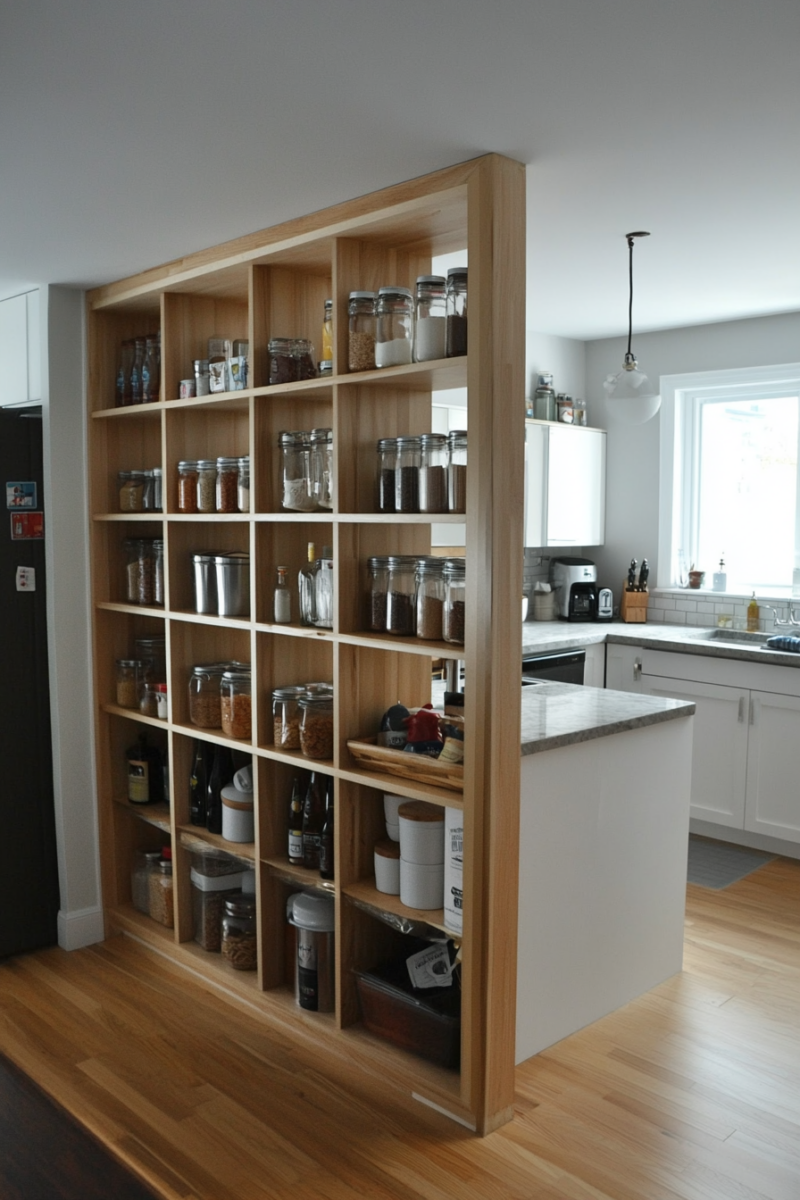
The pantry situation in my house was embarrassing. Canned goods stacked in front of other canned goods. No idea what I owned. Bought a fourth can of chickpeas because I couldn’t see the three I already had. Sound familiar?
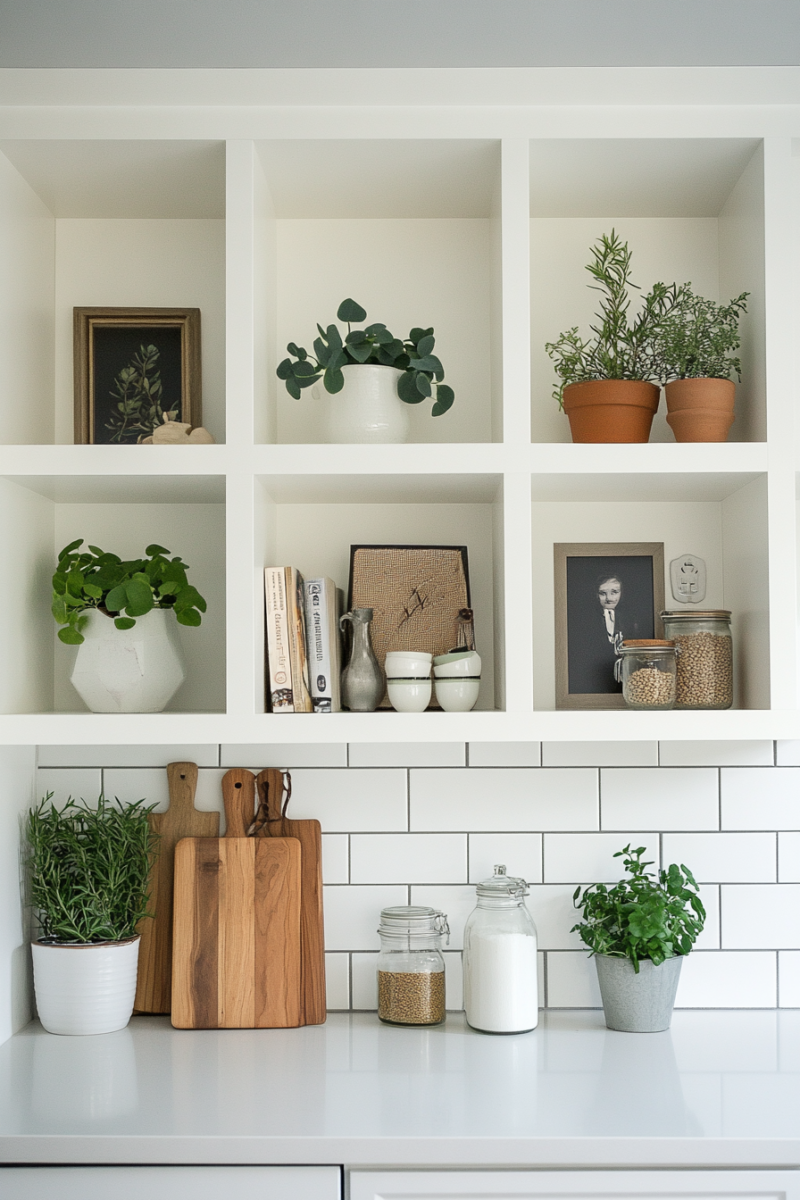
A Kallax in the pantry is not an obvious choice, but it’s a really good one. The cubbies are about 13×13 inches each, which is perfect for grouping food categories. Here’s how I’d divide it:
- Closed cubbies with door inserts: baking supplies, bulk grains, pasta, anything in crinkly bags that looks messy. Out of sight.
- Open cubbies with bins: canned goods sorted by type (beans, tomatoes, soups), one bin per category. You pull the bin out, grab what you need, put it back. No more digging.
- Open cubbies at eye level: oils, vinegars, frequently used spices in a small tray. Things you reach for daily.
- Bottom cubbies: heavy items. Large pots, a cast iron skillet, appliances you use a few times a week.
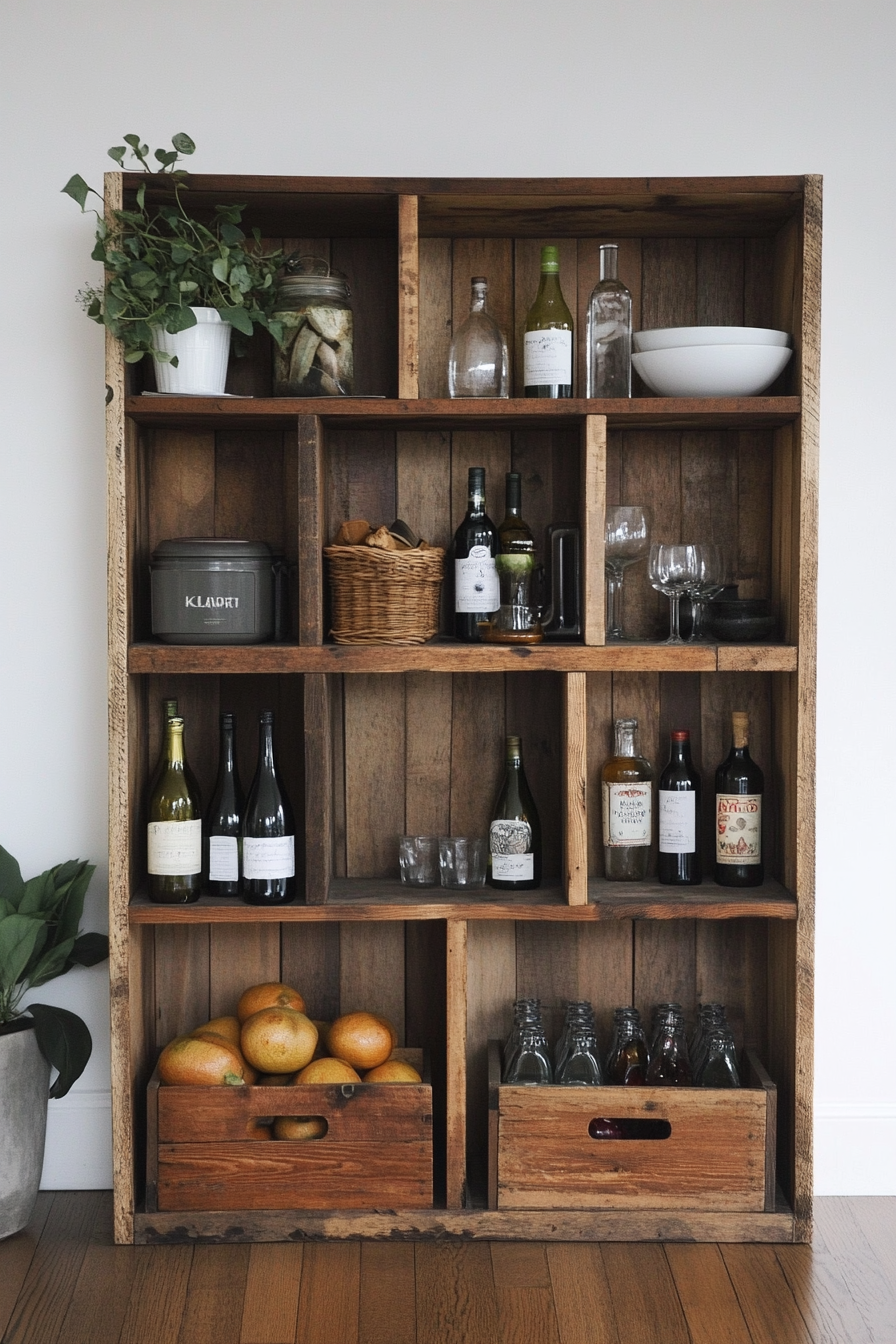
One thing I’d strongly suggest: get the doors that push open rather than the ones with visible hinges. They’re a few dollars more but the pantry looks so much cleaner when everything is uniform. And label the closed cubbies on the inside of the door with what’s in there. You think you’ll remember. You won’t remember.
For a pantry that’s tight on space, a 2×4 Kallax turned vertically gives you eight cubbies in a narrow footprint — about 30 inches wide. That fits in most pantry closets without blocking the door swing.
Bedside Tables That Actually Have Storage
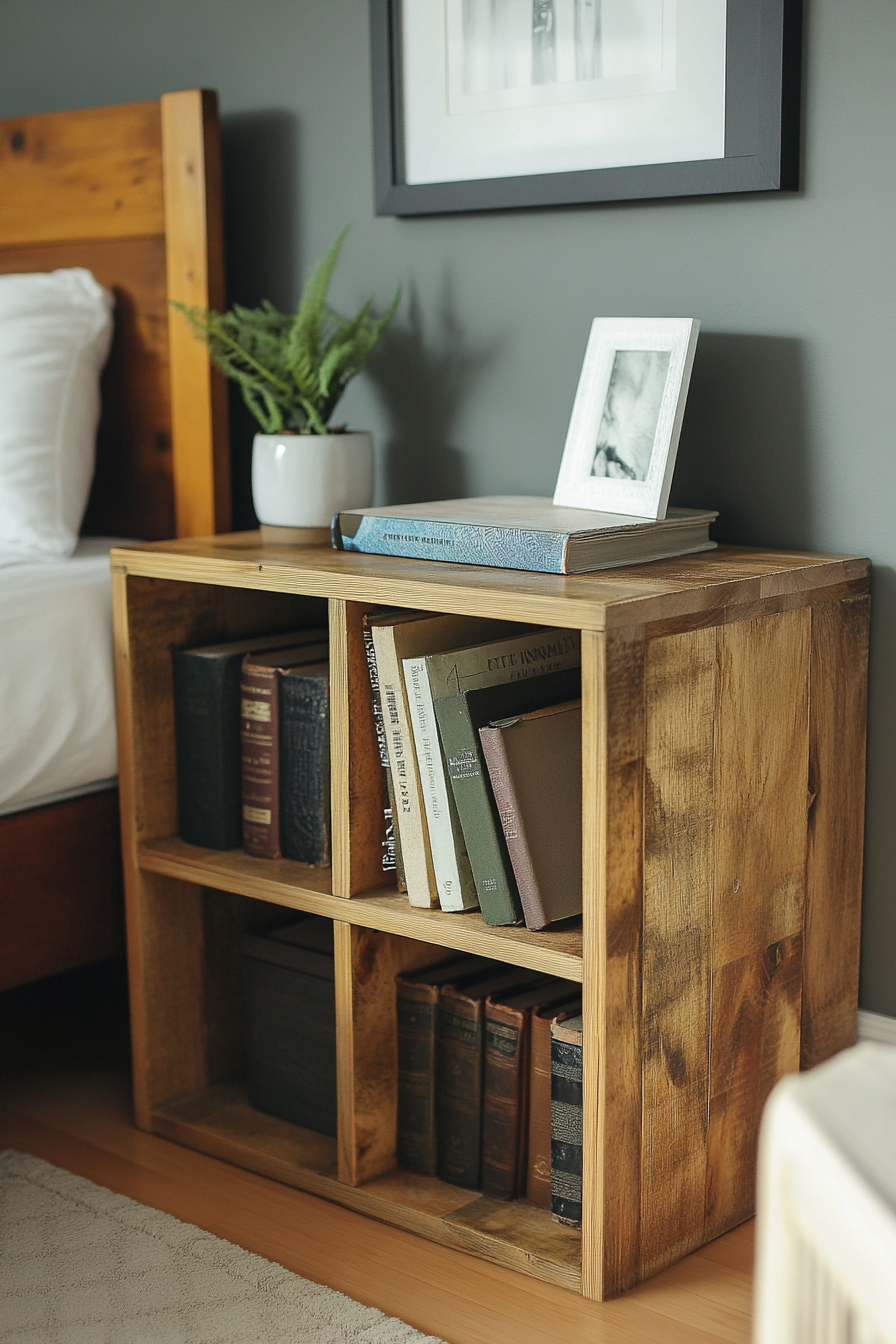
Normal nightstands have one drawer and a shelf. That’s it. I have books, my phone, a charger, reading glasses, hand lotion, a journal, and approximately six bookmarks I’m using simultaneously. One drawer is not enough.
A 1×4 Kallax turned on its side is basically a nightstand with four cubbies. You get way more storage, and it sits at a really natural bedside height — about 15 inches, which is lower than a standard nightstand but actually quite comfortable if your bed is a typical platform height.
What actually goes in mine:
- Top cubby: current read, reading glasses, small lamp (a clip light attached to the wall above it honestly works better and saves the cubby space)
- Middle cubbies: fabric bin for charging cables and tech stuff in one, spare linens or a throw blanket folded up in the other
- Bottom cubby: books I’m planning to read next, or an extra pillow
The one thing I’d say: bolt it to the wall. The IKEA anti-tip hardware is included and it takes five minutes. A Kallax on its side is more stable than you’d think, but if you have kids or a dog who bounces off furniture (hi, Biscuit), anchor it. This is the part I skipped and then immediately regretted when he jumped on the bed dramatically one evening.
Put a small lamp on top, a plant or two, maybe a framed photo. It looks like something you chose on purpose, not like a storage cube from a flat-pack box.
Home Office Storage That Doesn’t Feel Like Chaos

The home office is where good organization goes to die. You start with a system, and three weeks later there are sticky notes everywhere and a printer that lives on the floor. I’ve been there.
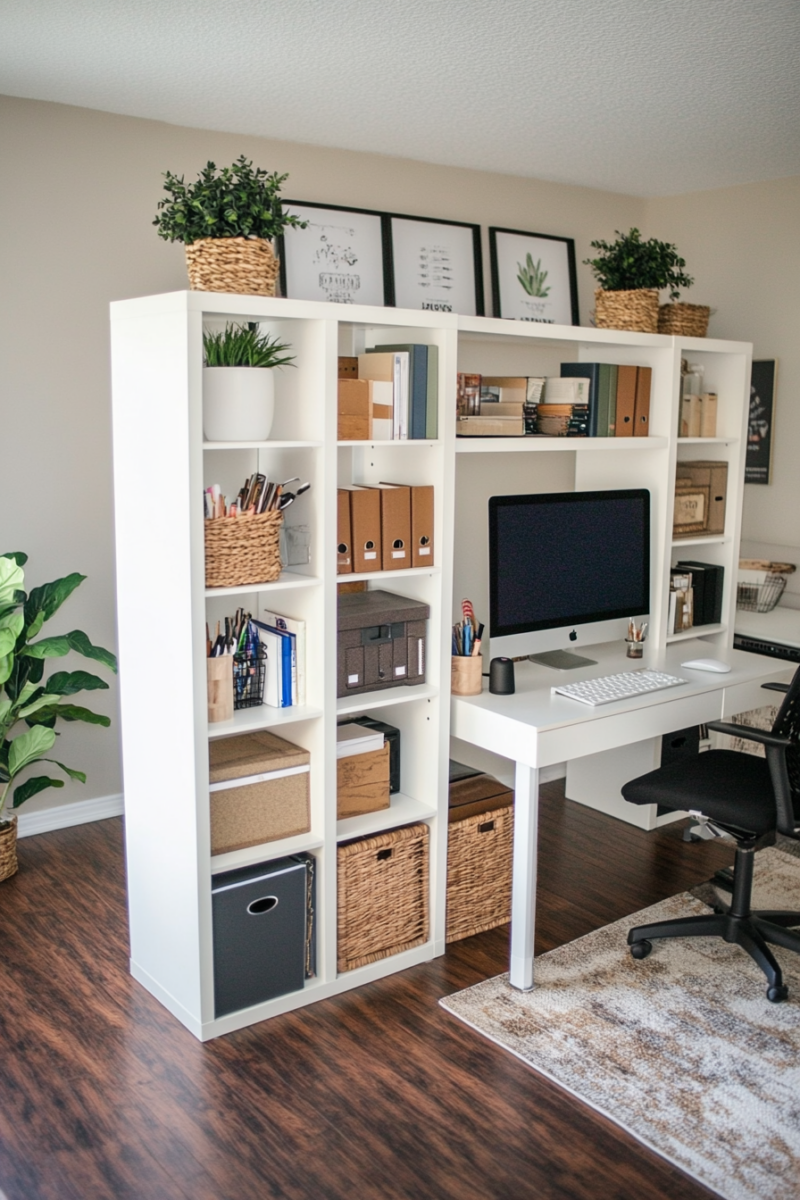
A 4×2 Kallax against the wall behind or beside your desk is genuinely the most useful thing you can do for a home office. Here’s a breakdown that actually functions day-to-day:
- Dedicated printer cubby: measure first (most home printers are around 16-18 inches wide, so you might need to remove the divider between two cubbies for this). Having the printer at desk height and out of the way is a small thing that feels huge.
- Reference material cubbies: use IKEA Kallax magazine files or regular office file boxes. One per project or category. Label the spines.
- Daily essentials open cubby: pens, tape, scissors, sticky notes, the things you grab constantly. No lid, no bin, just easy access.
- Closed-door cubbies for: anything that looks messy. Extra paper, cords, supplies you don’t use daily.
- One purely decorative cubby: a plant, a candle, something that has nothing to do with work. Genuinely helps the space feel less like a stressful cave.
If you’ve got wall space above the Kallax, floating shelves at eye level add another layer of reference books or display items without adding more floor-level bulk. The combo of a Kallax base unit plus two floating shelves above it costs less than most single office shelving units and holds significantly more.
Bathroom Storage Without the Ugly Wire Rack
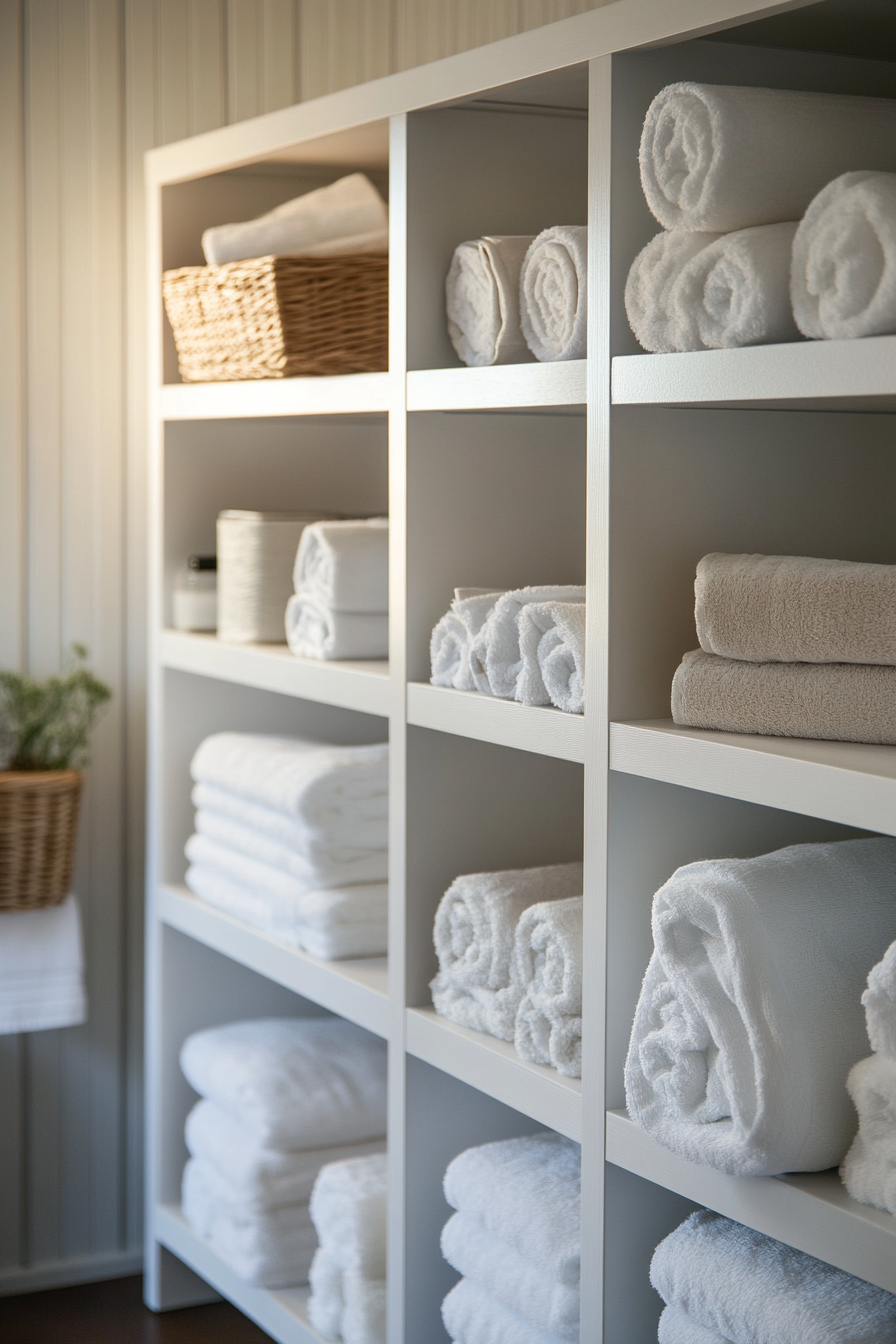
I have strong opinions about bathroom storage. Wire racks are chaos. Medicine cabinets fill up immediately. The under-sink cabinet is always a disaster of half-empty cleaning products. The Kallax is genuinely a better option than most bathroom-specific storage furniture, and it doesn’t look clinical.
A 1×4 or 2×2 Kallax in a bathroom gives you intentional, compartmentalized storage that actually stays organized because everything has its own box. Here’s what works:
- Rolled towels, grouped by color, in open cubbies. This is the spa trick and it really does make a bathroom feel fancier than it is. Three white towels rolled in a cubby look way better than the same three towels folded on a shelf.
- Closed cubbies for: extra toilet paper, shampoo backstock, hair tools, cleaning supplies. Anything you don’t want on display.
- One open cubby with a small tray: daily skincare, a candle, a small plant if you’ve got the light for it. The tray keeps it from looking scattered.
One practical note: the standard Kallax finish is moisture-resistant and wipes down easily, which makes it fine for most bathrooms. If yours is a very steamy bathroom with poor ventilation, keep the unit away from the direct shower area and don’t leave it soaked regularly. It’s not waterproof, just water-resistant. There’s a difference. (I learned this in a previous apartment. The bottom of that unit was not pretty by the time I moved out.)
Display Shelves for Collections (Without Looking Like a Hoarder)
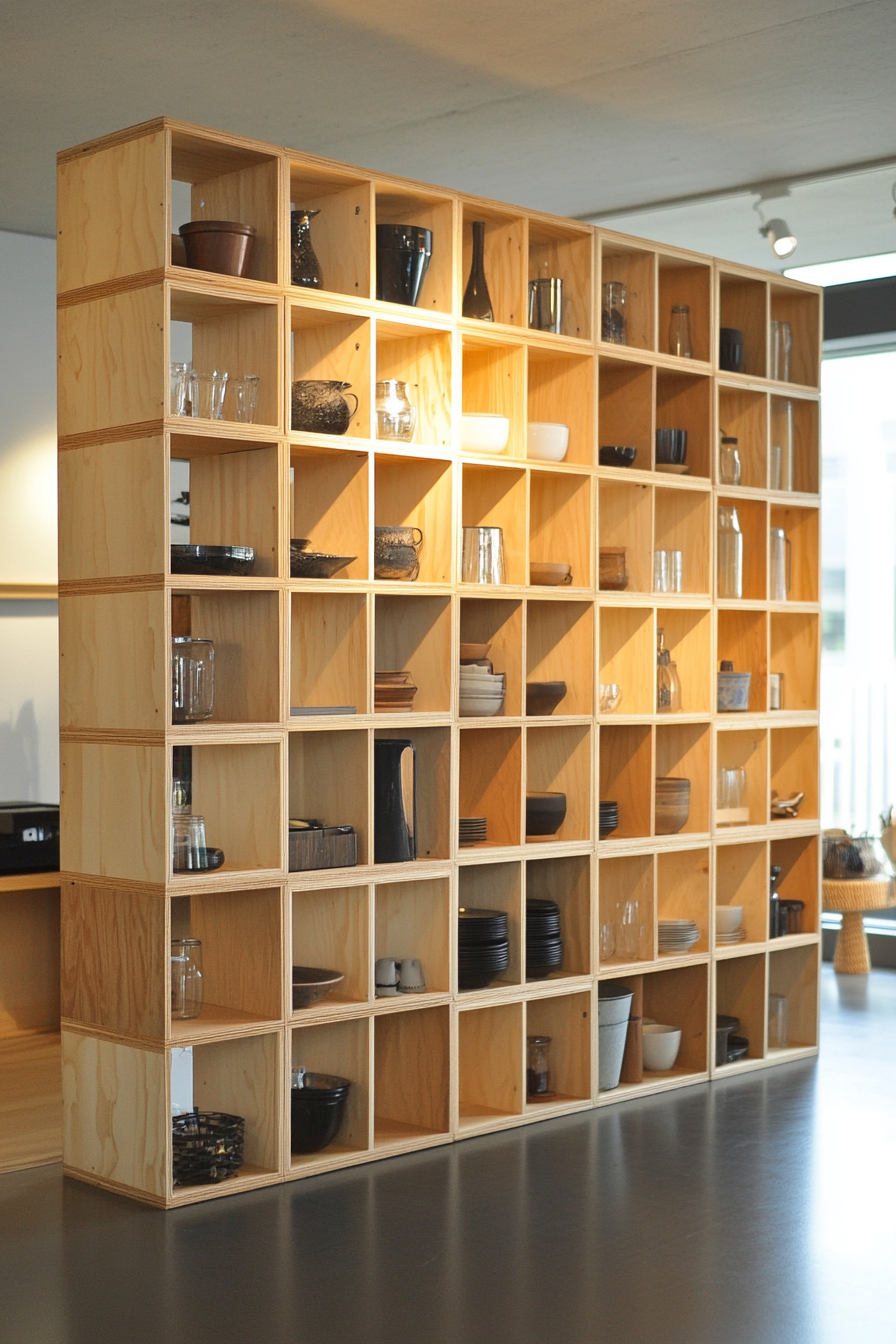
I think the reason collections often look cluttered is that there’s no framework around them. Everything is just… out. The Kallax fixes this because it gives each object its own square of space, like a tiny gallery frame.
Each open cubby becomes its own display case. If you collect vintage cameras, one per cubby or two small ones grouped together. If you collect pottery, one piece front and center per cubby. The compartments do the work of making things look intentional even when you have a lot of them.
A few display tricks that make a real difference:
- Line the backs of the cubbies. Wallpaper samples, craft paper, even fabric works. A dark-backed cubby makes light-colored objects pop and vice versa. I used remnant contact paper in a deep green behind some white ceramics and it looked so good I kept it even after I changed everything else.
- Add a small battery-powered puck light inside a cubby for anything you really want to highlight. You can get a six-pack for around $12 and they stick right to the inside top of the cubby.
- Group by color OR by category, not both at the same time. Pick one organizing principle and stick to it. Mixed signals look messy.
For book collections specifically — face-out display for favorite covers, spine-out for everything else. A row of face-out books in one cubby looks editorial in a really good way.
Craft and Hobby Storage That Stays Organized Past Day One
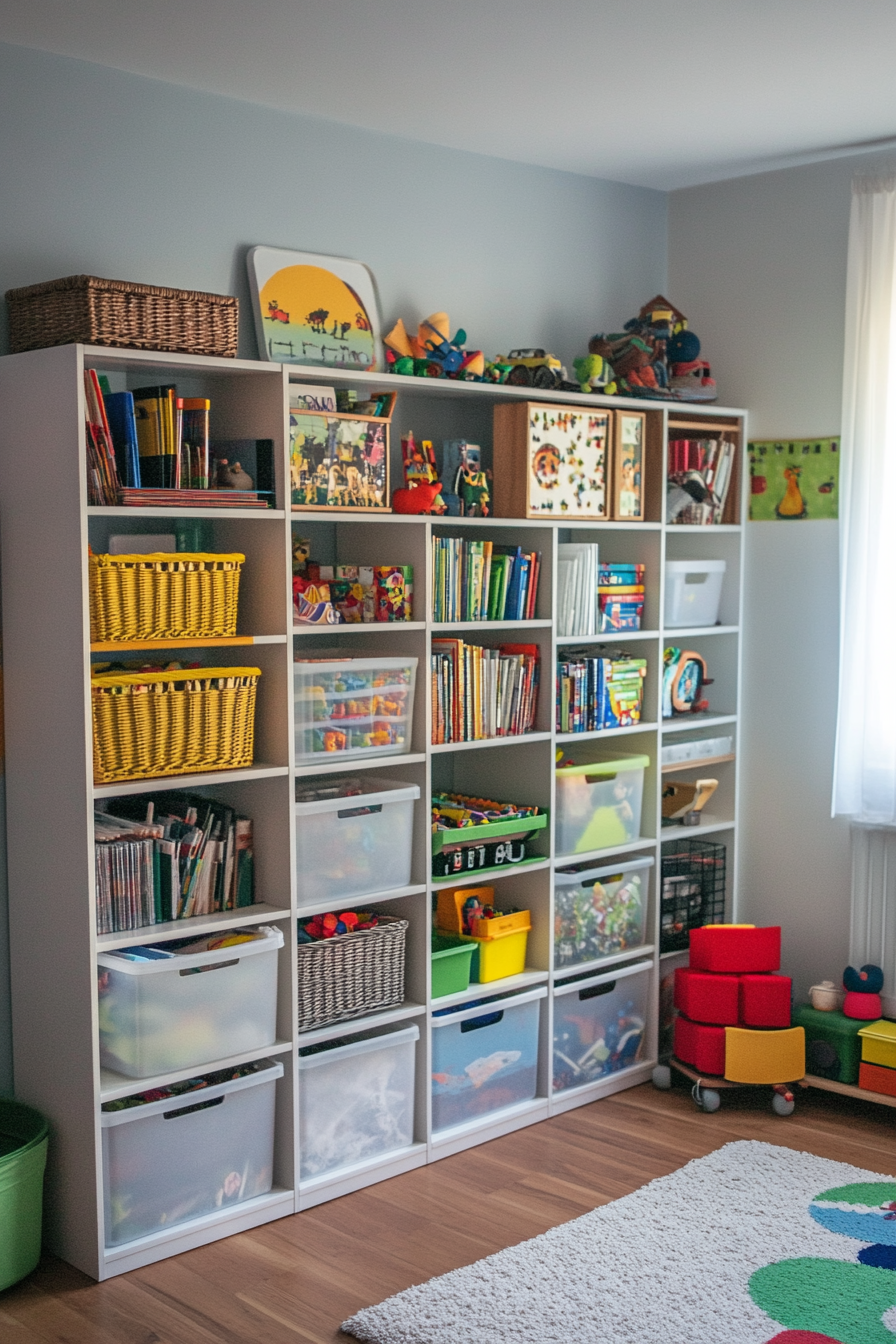
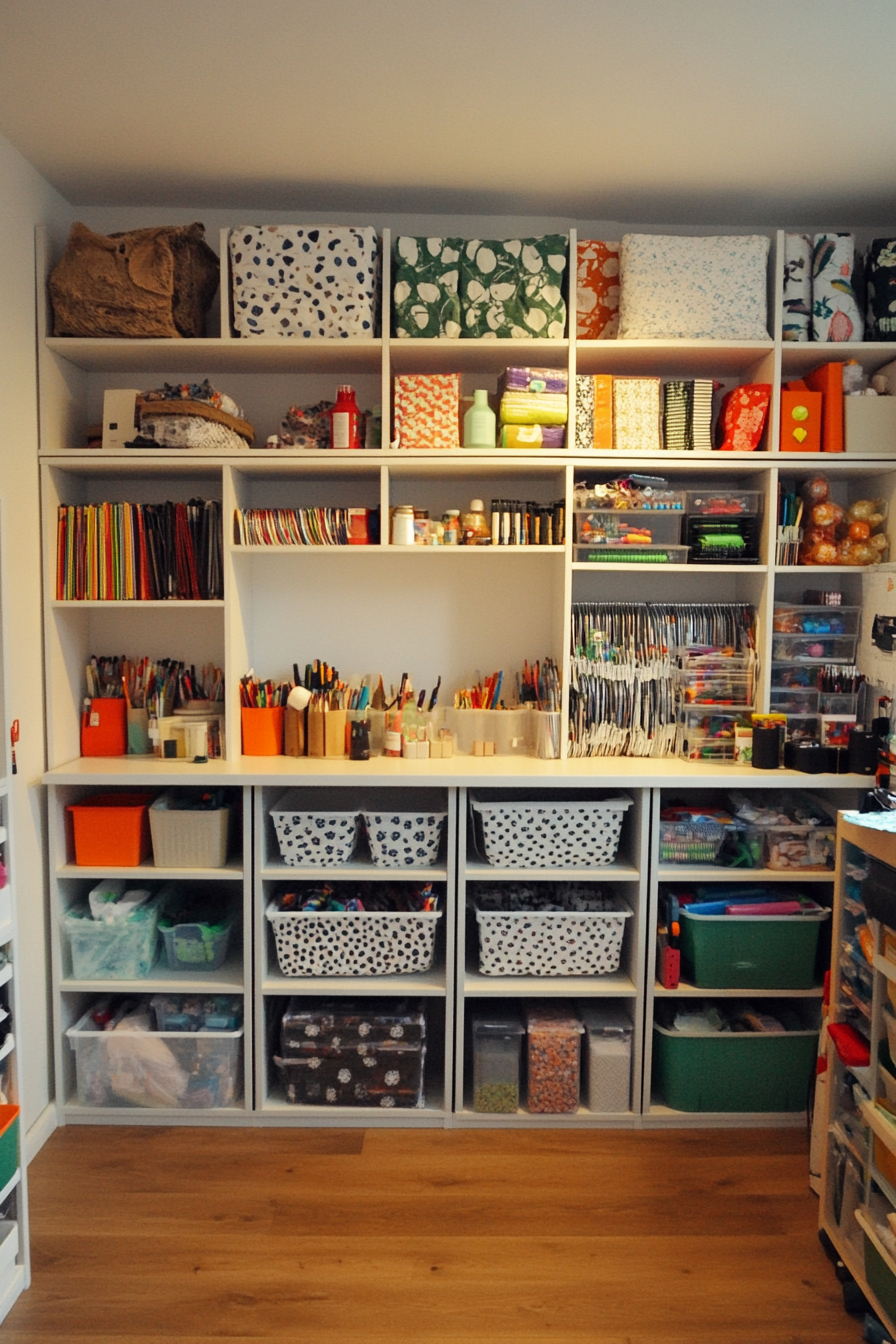
Craft storage is one of those things that requires honest self-assessment. What do you actually use weekly? What comes out once a month? What are you saving “just in case” and should probably donate? Because the Kallax system only works if you’re honest about what goes where.
Here’s the rule I follow: anything with sharp points or that stains goes in a closed cubby. No exceptions. Scissors, rotary cutters, acrylic paint, ink pads — all closed. This isn’t just tidiness, it’s practical. (I have knocked over an open cubby of craft stuff exactly once. It was enough.)
What works in open cubbies:
- Yarn in small baskets, sorted by color — honestly a decorative feature on its own
- Rulers, paintbrushes in a small cup, tape rolls on a dowel rod
- Stamps and ink pads grouped together so you can grab the whole setup at once
- One “current project” cubby: whatever you’re actively working on lives here until it’s done
If you sew or do fiber arts, a 4×4 Kallax is deep enough that you can stand fabric bolts upright inside a cubby like books on a shelf. You can actually see your fabric this way. It sounds small but it completely changes how you interact with your stash.
Fabric bins that hang off the top of the unit add extra storage without adding floor space. IKEA makes a few that are specifically sized for Kallax, but honestly any canvas bin in the right dimensions works fine and costs less.
Garage Storage (Yes, It Works in There Too)
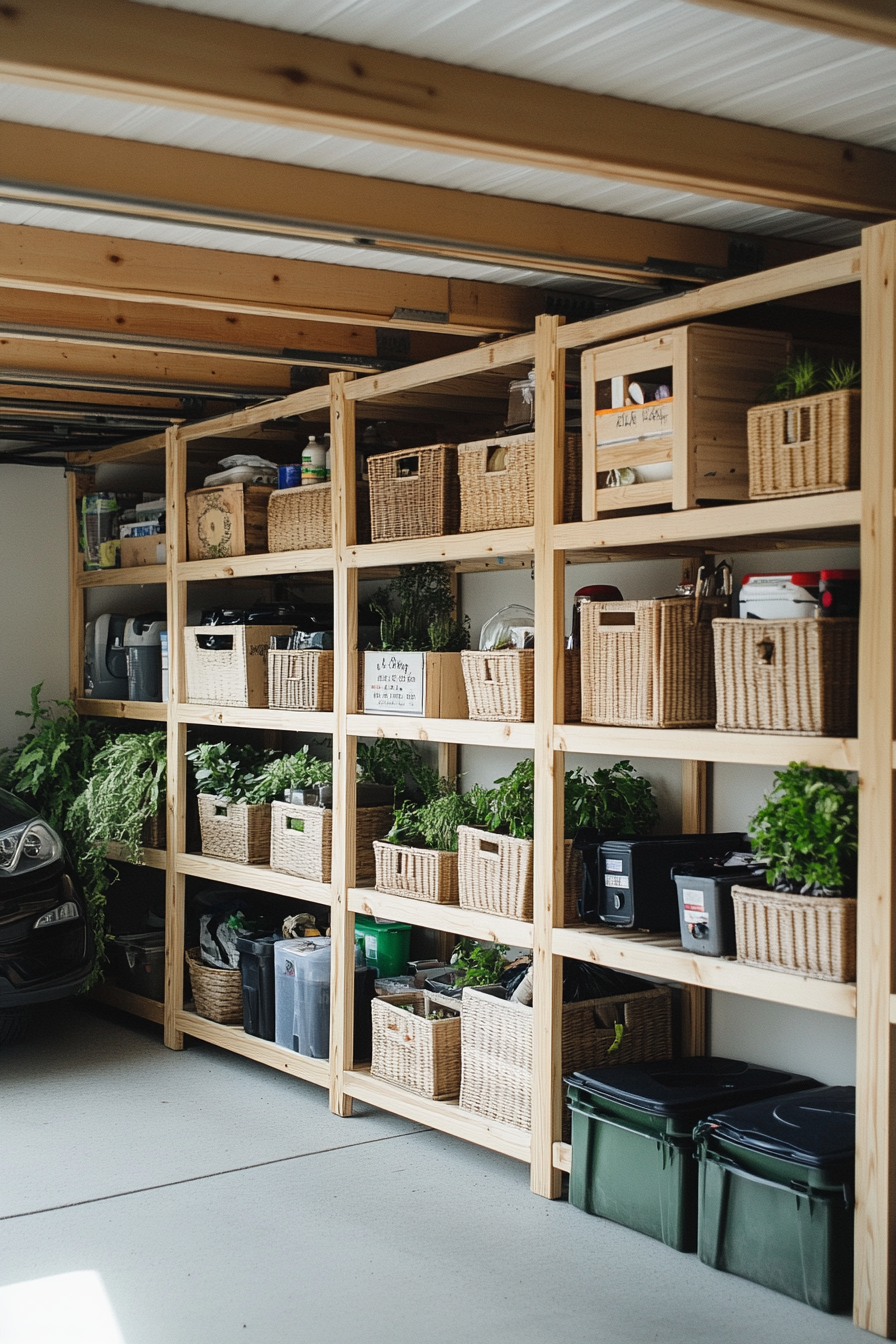
I’ll be honest — putting an IKEA shelf in the garage felt weird to me at first. Garages are for metal shelving and pegboards, right? But the Kallax cubby system actually solves a specific problem that wire shelving doesn’t: small, oddly shaped items that fall through or roll off open shelves.
The enclosed cubbies are genuinely better for garage organization than most garage-specific shelving, especially for:
- Automotive stuff: fluids, funnels, rags, small tools. Each in their own cubby, not mixed together in a bin where you can never find anything.
- Sports equipment: soccer balls, bike helmets, baseball gloves. One sport per cubby.
- Gardening supplies: seed packets, small hand tools, plant labels. Closed cubbies keep these dry and rodent-resistant.
- Hazardous items: anything chemical goes in a closed cubby, always. Push-open doors keep kids and pets out.
For heavy items, don’t exceed the weight limit per shelf (around 55 lbs per shelf according to IKEA, though I’d stay under 40 to be safe). And if you’re in a garage that sees temperature extremes, know that the particleboard construction doesn’t love repeated freeze-thaw cycles. Keep it along an interior wall if possible.
Mounting a Kallax horizontally on the wall works well for vertical garage storage — you’d need proper wall studs and the right hardware, but it frees up floor space for the car. Worth it if your garage is tight.
Window Box Platform With Hidden Storage Underneath
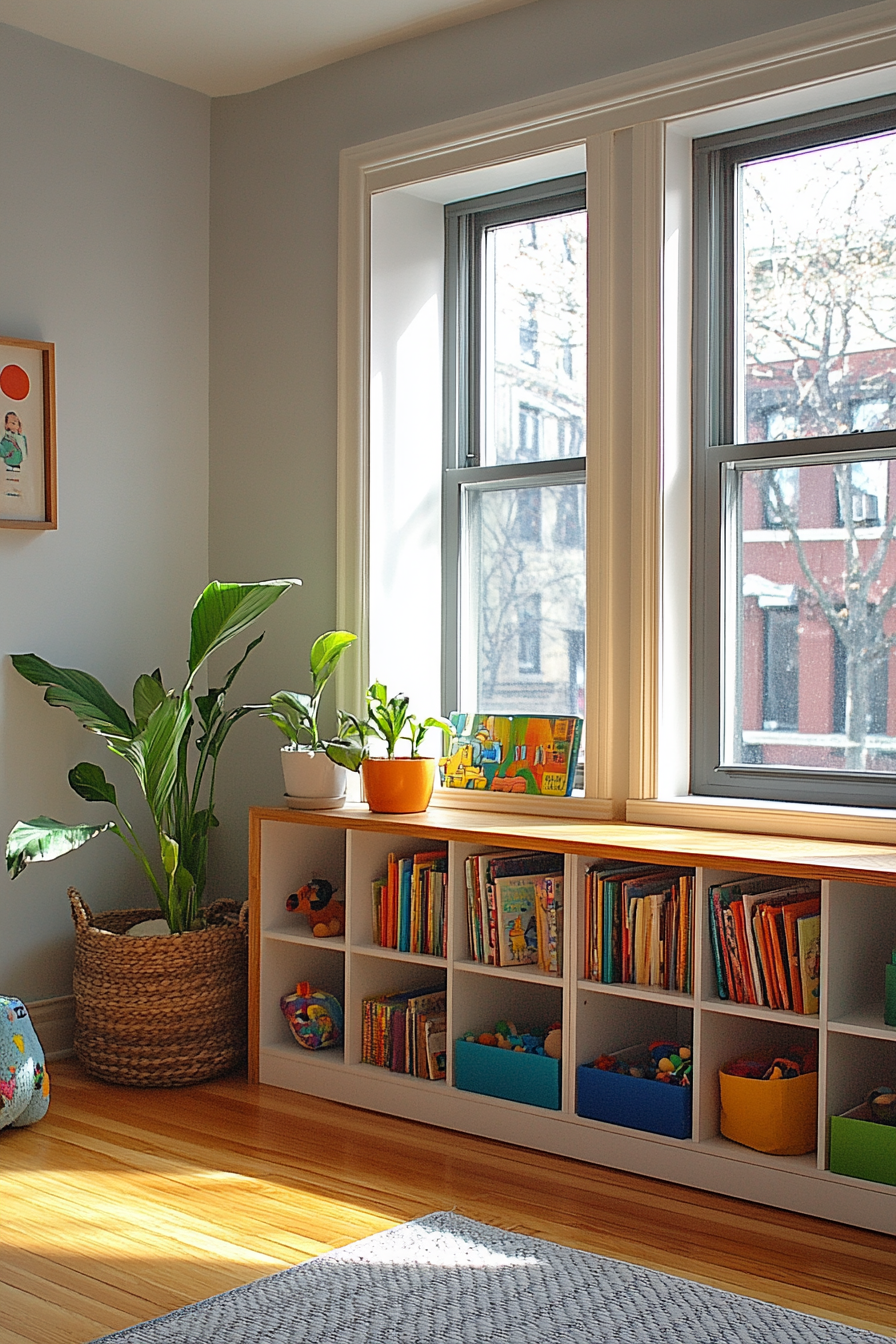
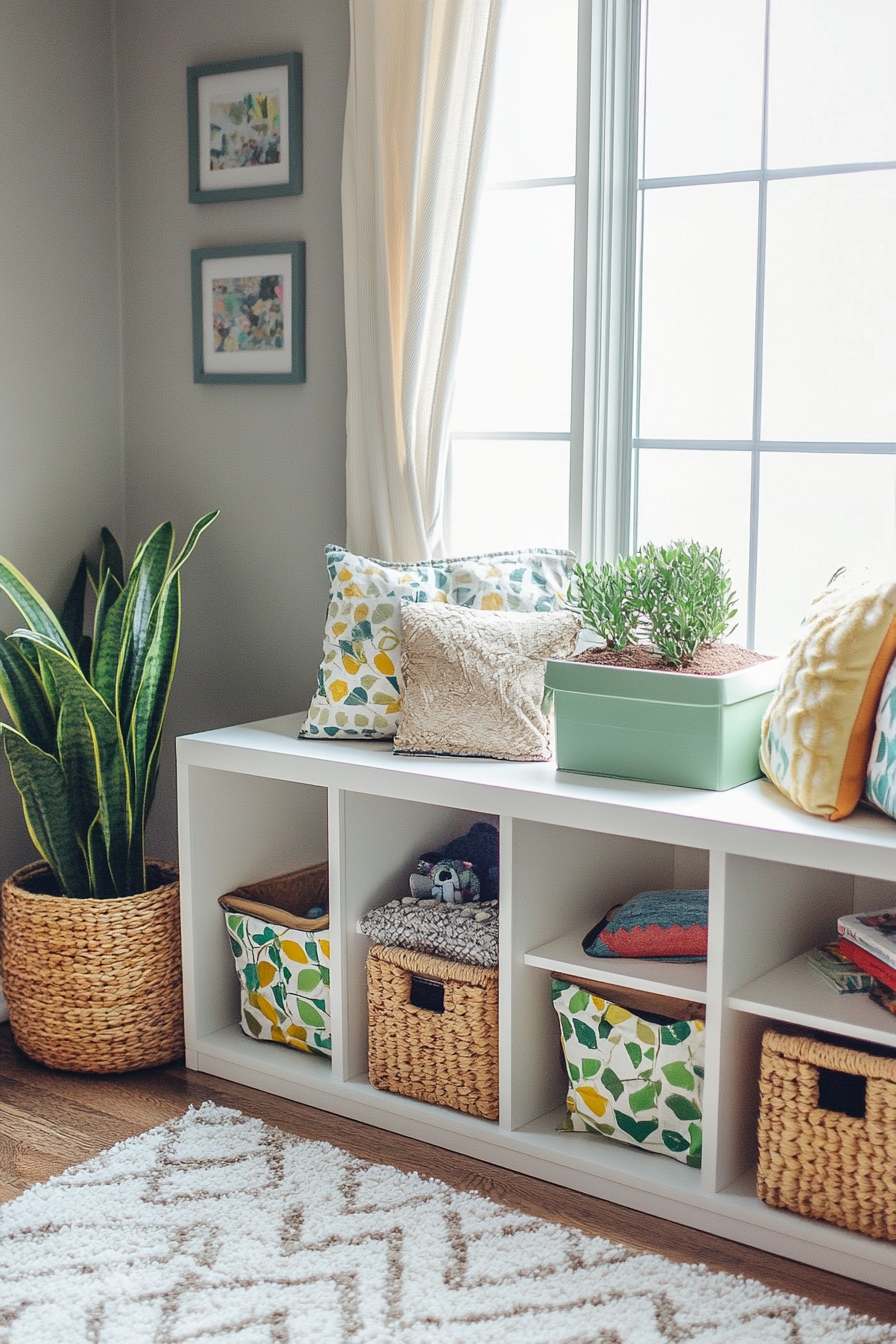
This one is genuinely clever and I kind of love it for anyone with awkward under-window space that’s currently just… nothing.
The idea is to lay a Kallax unit horizontally under a window, with the open cubbies facing into the room. The top of the unit ends up right at windowsill height, creating a little platform. You can put planters on the top surface, with the plants sitting in the window light. The cubbies below hold whatever you need — gardening supplies, extra pots, outdoor accessories.
Remove the back panel and secure the unit to the wall with L-brackets for stability. The open back means any water that drips from watering the plants doesn’t pool inside the unit. (Seal the top surface with a waterproof paint or a piece of cut tile if you’re going to be watering plants up there regularly. This is the detail that makes it last.)
Under-window spaces are so often wasted. This makes them both functional and genuinely pretty. If your window faces east or west and gets good morning or afternoon light, this is especially worth doing for herbs or small succulents.
Nursery Storage That Grows With the Baby
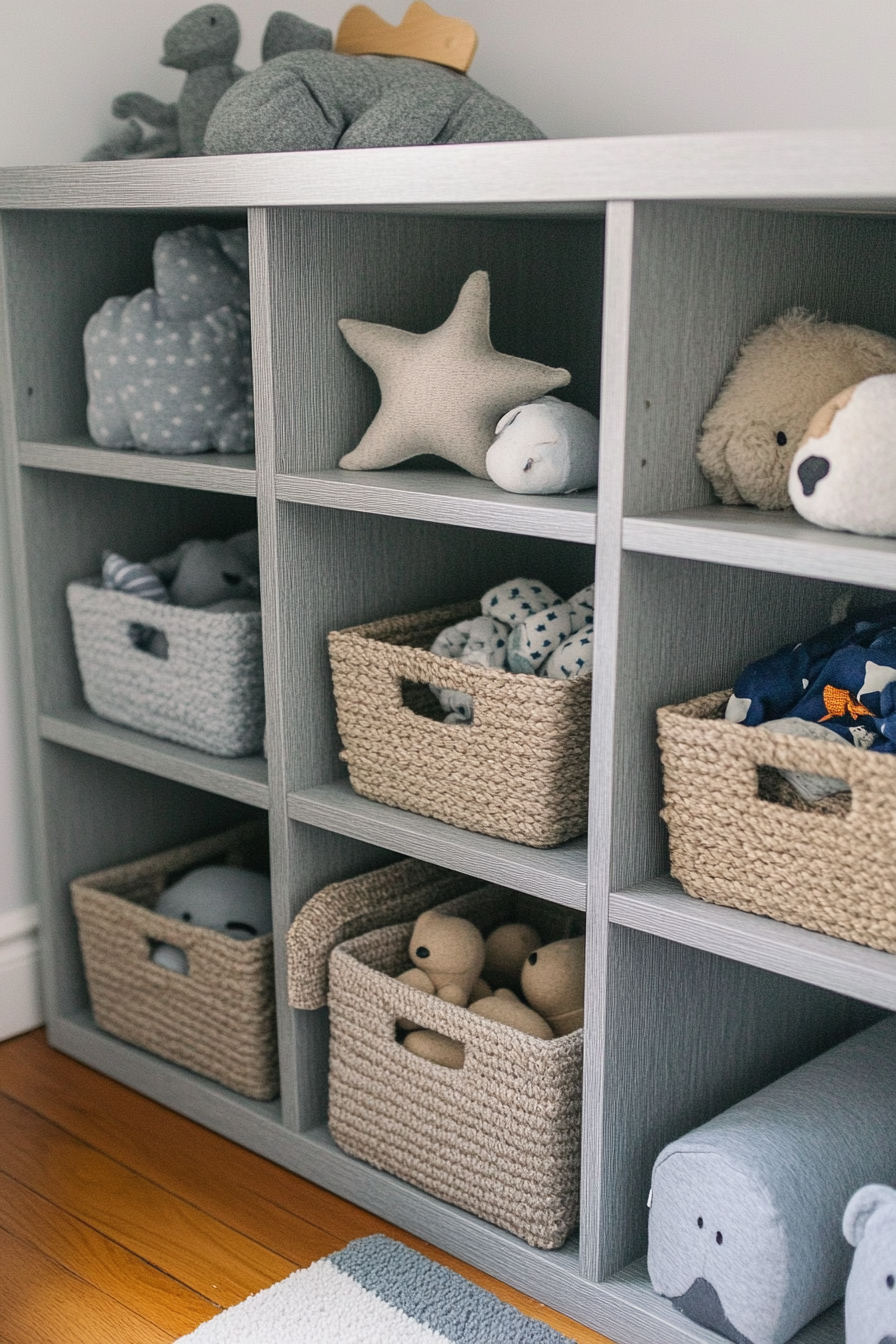
The nursery is one of those spaces where you think you need every specialized piece of baby furniture, and then the baby grows out of all of it in eighteen months and you’re stuck with a changing table that doesn’t do anything else. The Kallax doesn’t have that problem.
A white 4×4 Kallax in a nursery serves as dresser, bookcase, and toy storage all in one. Here’s how the cubbies break down at each stage:
Newborn phase:
- Closed cubbies for: folded onesies, sleep sacks, swaddles, burp cloths. These are tiny but there are so many of them and they need to stay folded.
- Open cubbies for: diapers and wipes in a basket (reach-without-looking storage), tiny socks in a small bowl (they escape if not contained), a few board books
- One cubby with a small basket on top: diaper cream, nail file, thermometer, the everyday care items
Six months to toddler:
- Bottom two rows: completely accessible to baby. Soft toys, board books, stacking toys. You want them to be able to pull things out and put them back.
- Middle rows: activity sets, puzzles with lots of pieces, things that need supervision
- Top rows: out of reach. Supplies, clothes that are too big yet, backup items
By school age, the same unit becomes a bookshelf and homework station storage. You’ve bought one piece of furniture that works for eight-plus years. That’s the real value of the Kallax in a nursery — it’s not just for now, it’s for the whole childhood.
Customized Closet Storage That Doubles Your Space
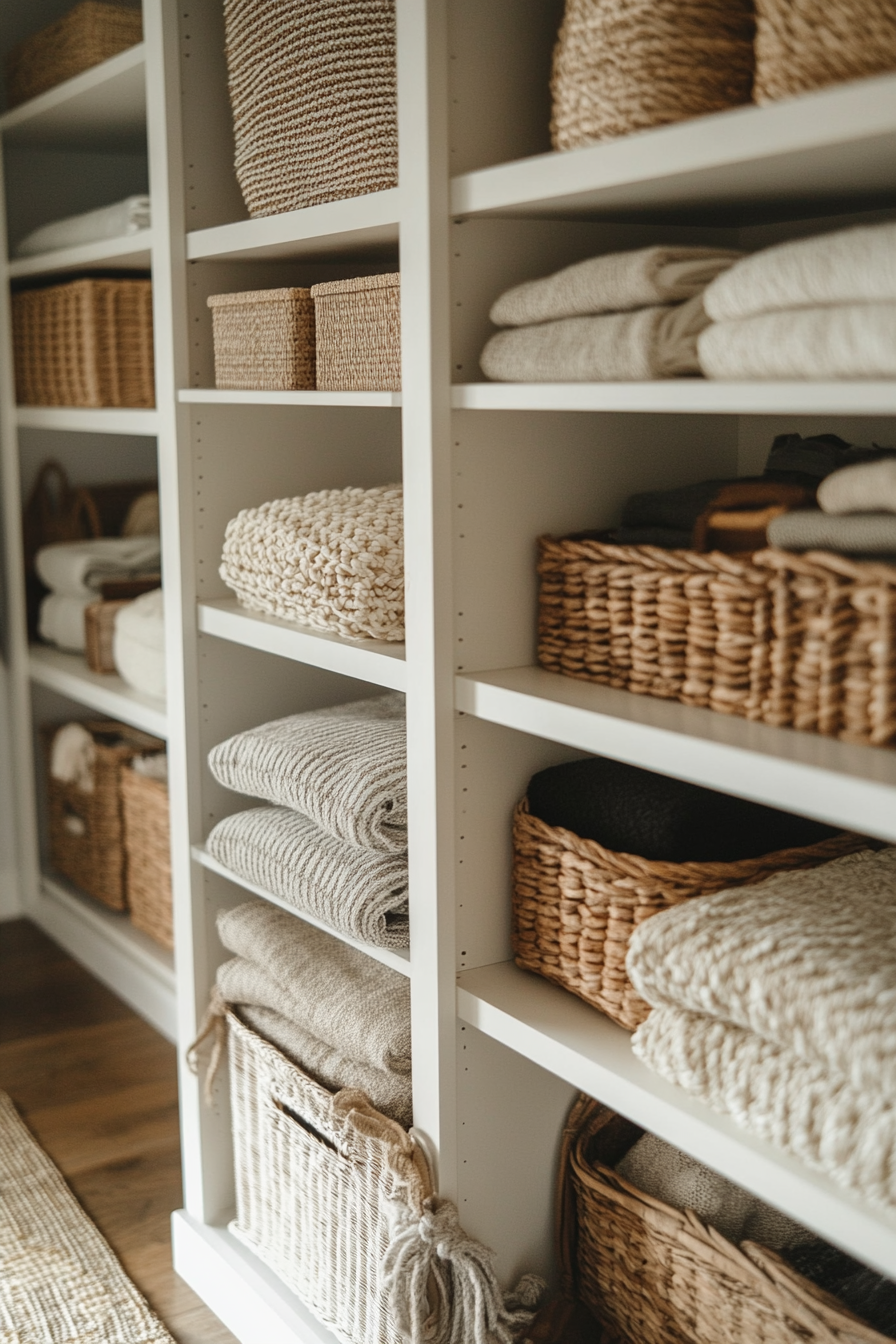
Closets are where I get the most excited about Kallax, which is maybe a strange thing to say, but hear me out. Most builder closets are just a rod and one shelf. That’s it. You can do so much better for about $60 and an afternoon.
The back-to-back divider hack I mentioned earlier works brilliantly in a walk-in closet, but even in a standard reach-in closet, a Kallax changes everything. Here’s what I’d actually do:
For a reach-in closet about 5-6 feet wide:
- Place a 2×4 Kallax on one end of the closet, vertically. This gives you eight cubbies for folded items — sweaters, jeans, workout clothes, whatever you fold rather than hang.
- The remaining rod space is now beside the unit, used for hanging clothes only. No more shoving folded sweaters onto the shelf above the rod where they fall every time you grab a hanger.
- Top cubbies of the vertical unit: bags, seasonal items, things you access rarely
- Bottom cubbies: shoes, with a small tray or box to keep pairs together
For a walk-in:
- Two units back-to-back in the center, as mentioned, with rods running the length of both sides of the closet
- Or: one unit on each short wall, with a single long rod on the long wall between them
The cubby height thing is real — if you’ve got a lot of folded t-shirts and jeans, you might find a standard cubby is taller than you need. Some people add a small piece of cut wood or a sturdy box inside to create a half-cubby shelf. It works fine and costs nothing if you’ve got scrap wood around.
I switched my closet to this system about two years ago and I’ve never gone back. The visual clarity of cubbies versus drawers means I can actually see everything I own, which means I actually wear more of my clothes. That’s either a win for my wardrobe or a threat to my budget. Probably both.