I killed my grass on purpose. Ripped it out, hauled in four tons of river rock and a couple of boulders, and stood back feeling like a genius. Then it rained, the water pooled against my foundation, and I realized I’d skipped the drainage step entirely. That mistake cost me about $200 to fix. So. If you’re thinking about rock landscaping, let me save you that particular lesson before you even get started.
The good news is that rock landscaping done right is genuinely one of the best things you can do for a yard. Lower maintenance than grass, better drainage, actually interesting to look at in January. Further down I’ll show you exactly how to build a dry creek bed that handles real runoff, how to install rock mulch so weeds don’t win, and how to place a boulder so it looks like it grew there. But first, let me show you the one project that made my whole yard click into place.
Build an Alpine Rock Garden That Actually Looks Like It Belongs There


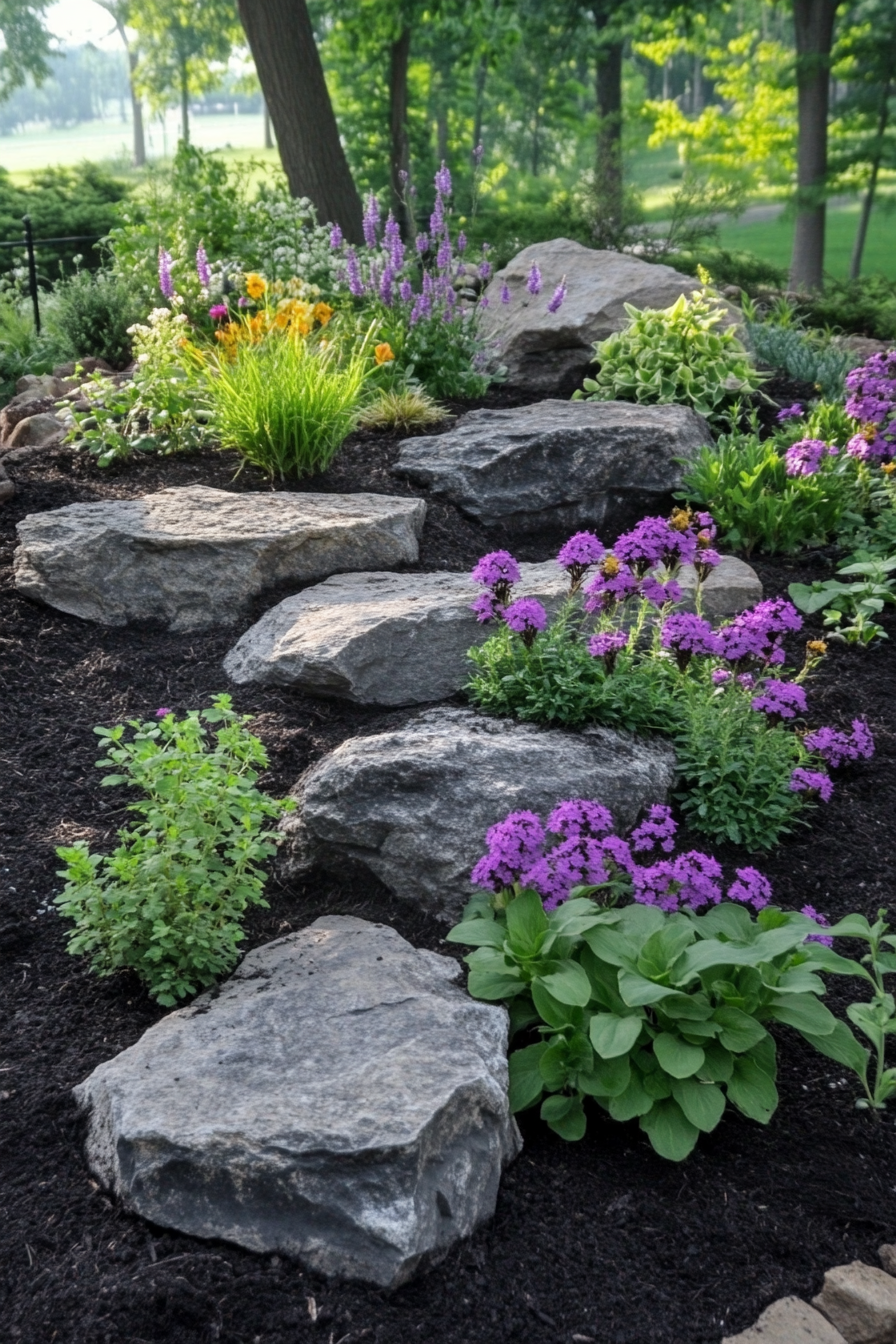
The first time I tried an alpine garden, I bought a bag of decorative white rocks from the hardware store, plopped some succulents in a circle, and called it a day. It looked like a grade-school science project. The thing about alpine gardens is that the rocks have to look like they were placed by water and gravity, not by someone who just got home from Lowe’s.
Here’s what actually works. Find a sloped section of your yard, or build one. You only need about a 15- to 20-degree angle for good drainage. Bring in a few loads of sandy, gritty soil mixed with existing dirt. Then source your rocks locally if you can. Limestone, sandstone, and granite all read as “natural.” The key detail most people miss: partially bury each rock. At least a third of it should be underground. That’s what makes them look like they’ve been there for fifty years instead of fifty minutes.
For sizing, think in three tiers. A couple of anchor boulders (I’m talking 18 to 24 inches across minimum), a cluster of medium rocks around 8 to 12 inches, and then smaller filler stones that settle into the gaps. Arrange them in odd-numbered groups. Three. Five. Not two, not four. Even numbers look staged.
Plant-wise, hens and chicks are basically unkillable and spread beautifully between rocks. Blue fescue grass adds that wispy mountain texture. Creeping thyme fills cracks and smells incredible when you step near it. Tuck a handful of crocus bulbs down in fall and you’ll get little pops of purple and yellow right at snowmelt. The whole garden costs maybe $80 to $150 in plants if you start small, and it genuinely takes care of itself after the first season.
Dry Creek Beds: The Project That Pulled My Yard Together (and Fixed My Drainage)

My backyard used to get a swampy soggy strip after every rain. I tried redirecting the downspout. I tried grading. Finally a neighbor suggested a dry creek bed and I thought it sounded too pretty to be functional. Wrong. It’s been three years and that soggy strip is gone.
The process matters a lot here, so let me walk through it the way I wish someone had walked me through it.
Start by watching where water flows during an actual rainstorm. Walk outside with an umbrella if you have to. Mark those paths with stakes. Your creek bed needs to follow that natural route or it won’t drain properly, full stop. Then dig a meandering channel, not a straight line. Real streams curve. Make the channel about 12 to 18 inches wide and 6 to 8 inches deep. Vary it: narrow in some spots, wider where water would naturally pool.
Lay landscape fabric in the channel before you touch a single rock. This is the step people skip, and it’s the reason they’re pulling weeds out of their creek bed two summers later. Then layer your rocks in this order: larger stones (4 to 6 inches) along the outer banks to define the edges, medium smooth river rock (2 to 3 inches) in the center channel, and small pebbles and coarse gravel to fill gaps. The color variation matters for realism. Darker, cooler tones in the deeper center. Lighter, warmer stones near the edges where a real stream would deposit sediment.
Drop a few larger boulders at random points, like they were carried there. Plant ornamental grasses, ferns, or hostas along the banks. During dry weather it’s a gorgeous landscape feature. During a downpour it earns its keep. That combination is hard to beat.
Retaining Walls: How to Get the Structure Right So It Doesn’t Topple

I’m going to be honest with you. A retaining wall over about 3 feet tall is a job for a professional or at least a really confident DIYer who has read up on local codes. But a low retaining wall, say 12 to 18 inches? Totally doable on a weekend, and genuinely one of the most satisfying projects I’ve done.
Here’s the thing about rock retaining walls that the pretty Pinterest photos don’t show: the drainage behind the wall is as important as the wall itself. If water builds up in the soil behind your stones, pressure builds, and eventually the wall tips forward. Every single time. So before you stack a single rock, dig your trench about 6 inches below your intended first course. Compact the base. Then as you build up, pack crushed gravel behind the wall, and if the wall is longer than about 10 feet, lay a perforated drain pipe at the base angled toward an outlet.
When stacking, lean each course slightly back into the hillside. That backward tilt, called a batter, is usually about 1 inch of lean for every foot of height. Use the biggest, flattest rocks for your base course. Stagger the joints as you go up, same principle as laying brick. Never let two vertical seams stack directly on top of each other.
Fieldstone is my personal favorite for a natural look. It’s often cheap or free if you know a farmer or a landscaping supply yard clearing out irregular pieces. Flagstone gives you cleaner lines if your house is more modern. Cap the top with flat stones and you’ve got a finished edge that also works as informal seating, which is a quiet bonus I use more than I expected.
Statement Boulders: One Rock, Placed Right, Changes Everything

I bought a single boulder for $65 from a landscape supply yard. It’s about 24 inches tall, rough-textured gray granite, slightly flat on one side. I spent more time deciding where to put it than I did getting it home (which involved a hand truck, a lot of swearing, and my neighbor Dave). That boulder is now the thing people notice first when they pull into my driveway. Worth every penny and every bruised shin.
Placement is the whole game. Position a single boulder off-center, never dead center in a bed. The rule of thirds works here: imagine your bed divided into a 3×3 grid and place the boulder near one of the intersection points. It instantly looks more natural and deliberate than planting it in the middle like a birthday candle.
Bury it. Seriously, bury about one-third of the boulder’s total height. A 24-inch rock should sit with roughly 8 inches underground. This is what makes it look like it emerged from the earth rather than got dropped there by a landscaping crew. Pack soil firmly around the base after placement.
For plant companions, low-growing ornamental grasses planted 12 to 18 inches away soften the base without hiding the rock. A clump of black-eyed Susans or coneflowers a little further out gives seasonal color. Keep it loose and asymmetrical. The boulder is the star; the plants are supporting cast.
If you’re working with a bigger space, group three boulders of noticeably different sizes together. One large (18 to 30 inches), one medium (10 to 15 inches), one small (6 to 10 inches). Cluster them close but not touching. That grouping reads as a natural rock outcropping and costs a lot less than you’d think at a landscape supply yard if you’re willing to pick through their irregular pile.
Gravel Pathways: Which Type to Use and How to Build One That Lasts

I have a gravel path. I also have Biscuit, my dog, who scatters it across the lawn every time she barrels down it at full speed. So I’m going to give you advice with that specific chaos built in, because gravel paths are not all created equal when it comes to staying put.
Quick comparison so you can pick the right material:
- Pea gravel: Pretty, rounded, comes in warm beige and gray tones. Problem is it rolls. It’s the least stable underfoot and the easiest to scatter. Better for decorative areas than high-traffic paths.
- Decomposed granite (DG): My honest recommendation for most paths. It compacts down to an almost solid surface, drains well, and stays where you put it. Costs roughly $35 to $50 per cubic yard. Comes in tan, gold, and rust tones.
- Crushed granite: Angular edges grip each other and hold better than rounded gravel. Good middle ground between the loose feel of pea gravel and the packed surface of DG.
- River rock: Bold and textural. Best for accent paths you walk slowly, not the route between your back door and the garage that you’re speed-walking in the dark.
For installation: excavate about 4 inches down. Lay landscape fabric (yes, you need it here too). Install metal edging along both sides, this is what keeps gravel from migrating into your lawn. Pour a 2-inch base of coarse crushed stone for drainage, then top with 2 inches of your chosen decorative gravel. Compact with a hand tamper or rent a plate compactor for longer paths. A 3-foot-wide path for a typical backyard run of 20 feet uses roughly half a cubic yard of material.
Plant low-growing things like creeping phlox or alyssum right at the edge of the path. It softens the look and, bonus, it smells good when you walk past it.
Rock Mulch Beds: The Honest Pros, Cons, and How to Do It Right

Rock mulch is one of those things I was skeptical about for years. It looked sterile to me, too stark. Then I installed a small lava rock bed around my drought-tolerant plants in the side yard and didn’t pull a single weed out of it for eight months. Eight months. Versus the wood chip beds I was refreshing and weeding constantly. I’m a convert now, with caveats.
The honest caveats first: rock mulch heats up in summer. It can make soil temperatures noticeably warmer, which is bad for plants that prefer cool roots and great for heat-loving plants like agave, ornamental grasses, and lavender. Also, once you put rock mulch down, changing your mind is labor-intensive. It’s a longer commitment than wood chips. Go in knowing that.
Here’s a quick comparison to help you decide:
- Rock mulch vs. wood chips: Rock is permanent and low-maintenance long-term. Wood chips decompose and improve soil but need refreshing every 1 to 2 years. If your bed has drought-tolerant plants, rock wins. If you’re growing perennials that love rich soil, wood chips win.
- Lava rock: Lightweight, excellent drainage, rich red-black colors. About $5 to $8 per bag at most home improvement stores. Great for contemporary or Southwest-style beds.
- River rock (1 to 2 inch): Heavier, smoother, versatile in earth tones. Works with almost any style. Stays put better in wind.
- Crushed gravel: Clean and formal. Good for geometric beds near the house foundation.
Installation steps that matter: Clear the bed completely. Pull every weed by the root. Install heavyweight landscape fabric, not the cheap thin stuff, it degrades fast and weeds punch through it in a season. Cut X-shaped holes for each plant, fold back the flaps, set the plant in, fold fabric back around the stem. Apply rock to a depth of 2 to 3 inches. Keep it a few inches away from plant stems to prevent moisture issues.
The plants that look best in rock mulch: ornamental grasses, yucca, agave, lavender, salvia, sedum. Bold, structural, and they actually like the drainage.
Building a Rock Fire Pit Area That Feels Like an Actual Outdoor Room

My fire pit area took two weekends and about $180 in materials. It’s now the place I spend more time than any other part of my yard from September through November. If you only do one project this year, honestly, consider this one.
Location first, because getting this wrong is both dangerous and annoying to fix. Ten feet minimum from any structure, fence, or overhanging tree. Check local ordinances too, some neighborhoods require permits or have burn restrictions. Find a naturally level spot or spend time getting one level, it matters for stability and for not feeling like your chair is slowly sliding toward the fire.
For the pit itself: mark a circle about 4 feet in diameter. Excavate 6 inches down. Fill with 2 inches of compacted gravel. Then build up your stone walls with dry-stacked fieldstone or cut limestone in overlapping courses, no two joints lining up vertically. Build to about 12 to 18 inches high. Leave small gaps between stones for airflow. Line the interior with firebricks if you can find them at a salvage yard (usually $1 to $2 each), they protect your outer walls from the direct heat.
For stone choices: volcanic rock handles heat well and has great texture. Fieldstone is rustic and often available cheap or free. Avoid river rocks in high heat; they can crack or pop from moisture trapped inside. (I learned that second-hand from someone who had a very startling evening around their fire pit.)
Around the pit: flat stone pavers or a gravel surround creates a defined floor for seating. I used a mix of flagstone pieces I found at a salvage yard for about $40 total, laid them loosely around the pit in a rough circle. For seating, built-in stone benches are beautiful but a lot of work. Adirondack chairs work great. Some flat boulders positioned as seats are the most natural-looking option and basically free if you have any around.
Rock Water Features: What the How-To Videos Don’t Tell You

The sound of water over rocks is genuinely one of the best things you can add to a backyard. I hear mine from inside through an open window and it makes the whole kitchen feel calmer. But water features have a reputation for being high-maintenance, and I want to address that head-on because it’s partly true and partly fixable.
The main maintenance issues with rock water features: algae buildup, pump clogs, and evaporation. All manageable. Here’s how to set one up to minimize problems from the start.
Choose a spot visible from inside the house. This is underrated advice. You’ll get three times as much enjoyment from it if you can see and hear it from a window. Avoid putting it directly under a tree that drops leaves; they clog pumps fast.
The simplest version that actually works: a buried reservoir (a large plastic basin, at least 20 to 30 gallons), a submersible recirculating pump, flexible tubing running up through a stack of boulders, and rocks arranged to hide all the mechanics. Water bubbles up through the top boulder, flows down over the rock face, and drains back into the basin. No pond, no liner worries, minimal mosquito risk.
For pump sizing: a 200 to 400 GPH (gallons per hour) pump is enough for most small to medium backyard features. They run about $30 to $60 and use roughly the same electricity as a light bulb. Connect it to an outdoor GFCI outlet.
Rock selection matters for sound. Flat stacked slate creates a thin, trickling sound. Rough boulders with irregular surfaces create a louder babble. Smooth granite produces a quieter, gentler flow. Think about what you want to hear before you choose your stones.
Add a water treatment tablet monthly to slow algae. Top off the reservoir weekly in summer since evaporation is real. In winter, pull the pump if you’re in a freeze zone, store it inside, and drain the basin. That’s genuinely the full maintenance routine.
Rock Borders: The Smallest Change With the Biggest Visual Payoff

If you want a fast, low-cost project that makes your whole yard look more pulled-together, start with rock borders. I edged two of my planting beds with fieldstone I bought for $45 and suddenly everything looked intentional. Like someone who knew what they were doing lived here.
The choice of border style makes a real difference in the feel of your yard:
- Fieldstone (irregular, rustic): Works with cottage gardens, informal beds, older homes. Forgiving to install because imperfect placement looks right.
- Cut stone (clean, geometric): Better for modern or formal landscapes. Takes more precision but looks extremely sharp.
- River rock (smooth, rounded): Softer transitions, works almost everywhere, easiest to find at landscape supply yards in a range of sizes.
For installation: mark your border line with a garden hose first, so you can adjust the curve before you dig anything. Spray paint over the hose line, then set it aside. Dig a shallow trench about 3 to 4 inches deep along your marked line. Remove grass and roots. Set each rock firmly into the trench, pushing down until it sits stable. Position them close together with minimal gaps. Backfill around each rock and tamp down soil.
Rock size consistency matters more than people think. If you mix 3-inch rocks with 12-inch rocks randomly, it reads as messy rather than natural. Stick to one dominant size and add a few larger “accent” stones deliberately at corners or curves.
Plant low creeping plants just inside the border: creeping thyme, sedum, or sweet alyssum. They soften the stone edge and fill the space beautifully without taking over. And they make the border look like it’s been there for years, not weeks.
Zen Rock Gardens: Getting the Raked Gravel Look Without It Looking Fake

I’ll be real with you: a lot of “zen gardens” in American backyards miss the mark because they look like a box of raked sand with a couple of rocks dropped in randomly. The ones that actually feel calm and intentional follow a few specific principles that are worth understanding before you start.
The philosophy is simple even if the execution takes patience. Rocks represent mountains or islands. The raked gravel around them represents water or clouds in motion. Every element earns its place. Nothing is decorative for the sake of being decorative.
Start in a quiet corner with a defined boundary. A low wooden fence, a bamboo screen, or a simple border of larger stones all work to create psychological separation from the rest of the yard. Flat or very gently sloped ground is ideal. Dramatic slopes fight the meditative, still feeling you’re going for.
For rocks: choose three to five pieces maximum for a small garden (10 by 10 feet or so). One large “guardian stone,” set first, becoming the anchor. Two or three medium rocks grouped asymmetrically nearby. One small accent stone placed at a considered distance. Each rock should have an interesting side; turn it to face the main viewing spot. Partially bury each one.
For the raked material: decomposed granite or fine pea gravel both work, but the classic choice is crushed white or gray granite, around ⅛ inch grade, raked to about 2 inches deep. A Japanese-style wooden rake costs about $15 to $20 and creates those clean parallel lines or concentric circles around rocks. The raking itself is genuinely meditative once you get into it. I’m not being dramatic about that.
Plants should be minimal. One well-pruned Japanese holly. A clump of black mondo grass. Some moss encouraged to grow at the base of rocks by painting them with diluted yogurt (sounds weird, works great). Bamboo as a screen along the perimeter if you need privacy, though keep it in buried containers because otherwise it spreads aggressively and that’s its own problem.
Add one simple wooden bench or a flat stone seat. Face it toward your guardian stone. The whole point is to have somewhere to actually sit and look at the thing you made. Don’t skip that part.
Rock landscaping isn’t a trend that’ll feel dated in five years. It works with your yard instead of fighting it, handles drainage, suppresses weeds, and looks genuinely beautiful in every season including the dead of winter when everything else has given up. Start with one project, the creek bed if you have drainage issues, the border if you want something low-stakes and fast, or a single statement boulder if you want maximum impact for minimum effort. You’ll see why I pulled up all that grass and haven’t looked back once.