I built my first real home office for under $150, and honestly, it looked better than setups I’ve seen people spend $1,500 on. The secret wasn’t talent. It was IKEA, a drill, and a willingness to mess up a few times before getting it right.
If you’re working off a kitchen table right now, or crammed into a corner with nowhere to put anything, I’ve been exactly there. Further down I’ll show you a floating corner desk that costs about $100 total, a pegboard setup that genuinely changed how I work, and a few storage hacks so clever I’m still kind of proud of them. Stick around for the under-desk drawer trick alone — it’s so simple it’s almost embarrassing.

My first big project was a floating corner desk using an EKBACKEN countertop (the 74×74″ one, about $79) balanced on two LACK wall shelves. Huge surface, no floor footprint. Then I added a SKADIS pegboard above it, slid a RAST nightstand underneath for drawers, and used CAPITA legs screwed into a plank to create a second monitor shelf. Total cost landed right around $130. My jaw dropped when it was done.
I was obsessed after that. Completely hooked.

So here are my favorite IKEA desk hacks — the ones I’ve actually tried, the ones I’ve watched friends try, and the ones I would do if I had just a little more wall space (I don’t, Biscuit’s dog bed is taking up half the room).
Rolling Storage Cart Desk

This one is genuinely perfect if you’re renting and can’t put holes in the wall, or if your “office” doubles as something else depending on the day. The RÅSKOG utility cart is like $30 and it rolls. That’s the whole premise and it works beautifully.
What you’ll need:
- RÅSKOG utility cart (about $30)
- Wood plank or countertop cut to fit the top opening
- Two L-brackets
- Tape measure and drill
Measure the top interior of the RÅSKOG — it’s roughly 14″ x 17″. Cut a plank to fit snugly inside those dimensions, or have your hardware store cut it for you (most do it free or for a couple dollars). Attach two sturdy L-brackets on the underside of the plank so they hook over the cart’s rim and keep the top from shifting.
That’s genuinely it. Roll it to your spot, lock the wheels, work. When you’re done, roll it into a closet or against a wall. The open shelves on the cart hold notebooks, a charger, a lamp, whatever you need close by.
I’ll be honest — the surface area is small. It’s better for a laptop setup than a full monitor situation. But for a small apartment or a temporary work-from-home situation, it solves the problem without drilling a single hole. And $30 is hard to argue with.
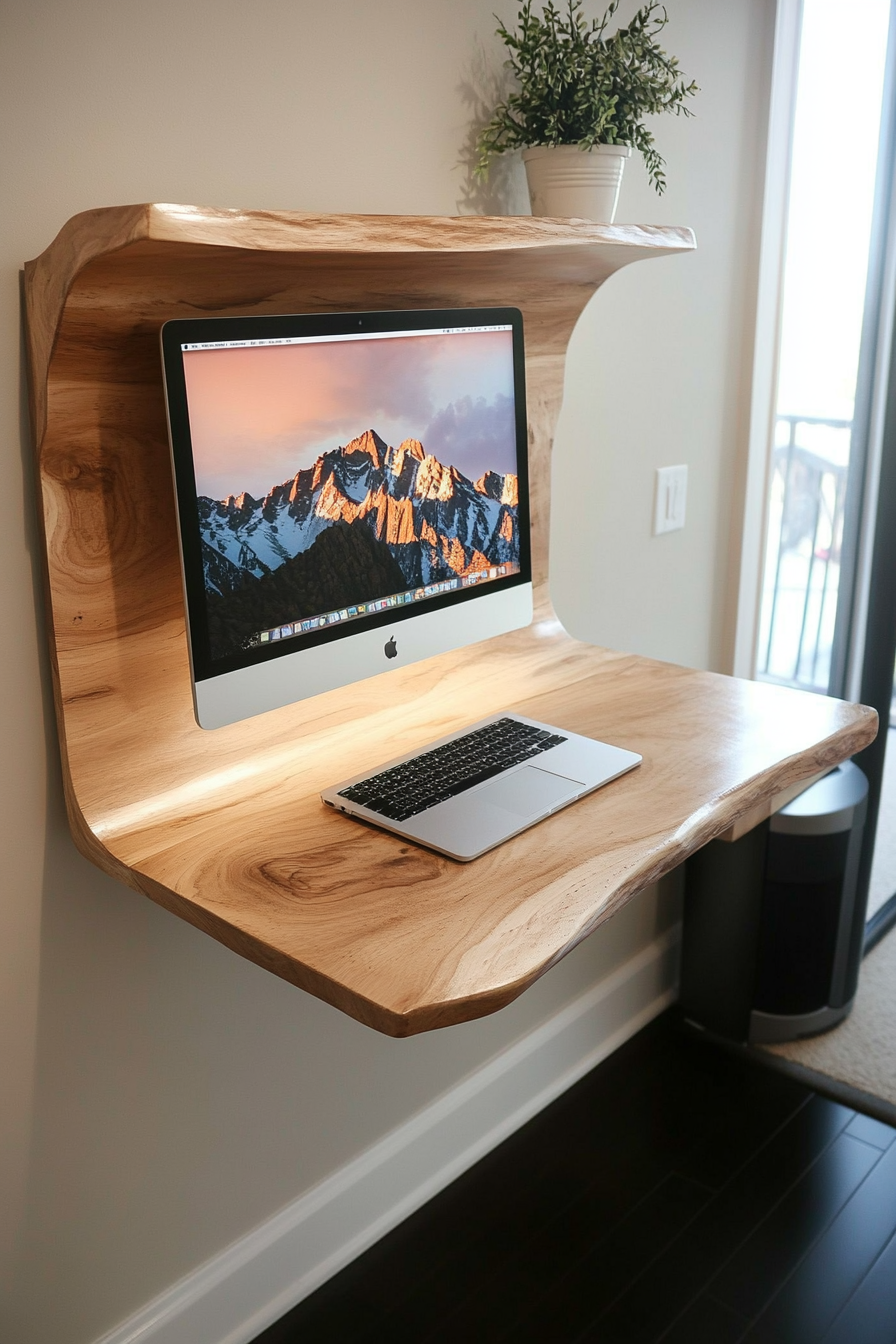
Floating Wall Desk

Overhead lighting is a crime against home offices and I will never stop saying that — but a floating wall desk with a lamp you control is genuinely one of the better setups I’ve had. It looks expensive. It’s not.
What you’ll need:
- One or two LACK wall shelves (~$15 each)
- CAPITA legs (set of 4, about $15)
- Wood countertop, door blank, or thick plank for the tabletop
- Heavy-duty metal brackets (at least 2 per side)
- Power drill and stud finder
Screw the CAPITA legs into the underside of your tabletop first — space them evenly, maybe 18″ in from each edge. Then find your wall studs (this is non-negotiable — drywall anchors will not hold a desk you’re actually using). Mount the LACK shelf into the studs at your desired desk height. Standard desk height is 28-30″, but if you’re tall, go 30-32″.
Use the metal brackets to attach the tabletop to the wall shelf. I used four brackets total — two on the back edge connecting to the LACK, two on the wall above going into studs. It doesn’t budge.
The great thing here is you pick the depth. Standard IKEA desks are 24-28″ deep. If your space is tight, a 20″ deep floating desk works fine for a laptop. If you want monitors, go at least 26″.
Under the floating desk, the wall is visible and you can do something nice with it — a small shelf, a print, even just a plant. It makes the whole corner feel intentional instead of thrown together.
Under-Desk Drawer Unit

This is the one I meant about being almost embarrassingly simple. There’s a void under most desks that just sits there collecting Biscuit fur and charging cables. Fill it with the RAST nightstand and your whole organizational situation changes.
What you’ll need:
- RAST 3-drawer nightstand (about $25)
- Your existing desk (the BEKANT works perfectly, as does most IKEA desks with open leg space)
- Tape measure
- Drawer organizers (optional, but worth it)
Measure the height of the open space under your desk before buying. The RAST is about 22″ tall. Most IKEA desks clear that with an inch or two to spare, but check first (I learned this the less-fun way when I had to return one).
Slide the RAST under your desk, centered or to one side depending on your preference. You don’t need to secure it — the desk’s weight and the friction of the floor keep it in place.
Top drawer: pens, sticky notes, small things you grab constantly. Middle drawer: chargers, cables, tech accessories. Bottom drawer: files, notebooks, stuff you need occasionally but not every hour. I put a cheap bamboo drawer organizer in the top one and it’s one of those small things that makes a disproportionate difference to your day.
Total cost: $25 for a three-drawer chest. Honestly one of the best bang-for-your-buck hacks on this whole list.
Hanging Desk Shelf

A shelf above your desk does two things: gets stuff off the desk surface and makes the whole setup look more considered. Plants especially. I have a trailing pothos up there right now and it makes my office feel like somewhere I actually want to be.
What you’ll need:
- RIBBA frame (the larger 19×24″ size works well here)
- LUFSIG hanging planter or a small succulent pot
- Screws and wall anchors (or studs)
- Stud finder
- Level
Remove the glass and backing from the RIBBA frame so you’re left with just the wood structure. This becomes your shelf surround. Mount it to the wall above your desk — I’d recommend mounting into a stud if you’re going to load it with anything heavier than small plants. Use a level because a crooked shelf above your eye line is going to bother you every single day.
Slide the LUFSIG planter into the frame opening. Fill it with something low-maintenance — succulents, air plants, or a faux plant if you know yourself well enough to admit that’s a better idea. (No judgment. Faux plants have come a long way.)
You can also use this same basic concept with a MOSSLANDA picture ledge shelf instead of the RIBBA frame — it’s about $12, mounts with two screws, and holds plants, small books, and a candle without any modification at all. That version takes maybe 15 minutes.
Floating Cabinet Light


I have a thing about task lighting. Overhead lights give me a headache within an hour and I think they make every room look like a doctor’s waiting room. This hack gives you soft, adjustable light right where you’re working, plus enclosed cabinet storage above the desk. It looks like something from a design magazine and costs maybe $60 total.
What you’ll need:
- STUVA wall cabinet (about $40-50)
- LED light strip with remote (budget around $15-20 on Amazon)
- Power drill, screws, stud finder
- Rubbing alcohol and a cloth
Find your studs above the desk and mark them. Hold the STUVA cabinet up to the wall and mark your drill points. Take it down, drill pilot holes, then screw the cabinet firmly into the studs. This needs to be solid — you don’t want a heavy cabinet above your head that’s only in drywall.
For the LED strip: wipe down the inner walls of the cabinet with rubbing alcohol first and let them dry completely. The adhesive on cheap LED strips fails fast if you stick them on a dusty or oily surface (I skipped this step the first time and had to redo the whole thing two weeks later). Peel and press the strip along the inner bottom edge of the cabinet.
Drill a small hole near the back bottom corner to route the power cord through and hide it behind the cabinet. Plug in, power on, use the remote to set the brightness to something warm and soft.
The light pools down onto your desk surface. It’s genuinely lovely. And you get a closed cabinet above your head for things you don’t want on display — extra paper, chargers, that pile of stuff you haven’t dealt with yet.
Corner Hutch Bookshelves

Corners are the most wasted real estate in any room. This hack turns a dead desk corner into vertical display and storage without buying anything fancy. Just a LACK shelf and a saw.
What you’ll need:
- LACK wall shelf unit (the 43×10″ one, about $20)
- Jigsaw or handsaw
- Wood glue and clamps
- Sandpaper
- Paint or stain (optional)
Disassemble the LACK unit into its two side panels. Cut each panel at an angle — you’re aiming for an inverted V shape when the two pieces are joined. The exact angle depends on how deep your corner is, but 45 degrees on each piece usually works well for a standard 90-degree corner.
Apply wood glue along the cut edges and press the panels together. Clamp overnight. Sand any rough edges once dry, then paint or stain if you want it to look more polished.
Set the finished hutch into your desk corner. The angled sides hug the walls and the whole thing feels built-in even though it’s just resting there. Fill it with small plants, a few books, a framed photo. It genuinely looks custom.
One note: the LACK shelf’s particleboard doesn’t love a jigsaw that goes too fast — take your time on the cuts or the edges will chip. A slow, steady pass gives you a much cleaner line.
Floating Desk Topper

If your desk has enough surface but not enough vertical space for monitors and a laptop at the same time, a raised second tier fixes this completely. I used this setup for about two years and it’s so much better for your neck than hunching toward a monitor sitting flat on the desk.
What you’ll need:
- EKBACKEN countertop or a thick wood shelf
- CAPITA legs (set of 4, 4″ or 6″ height)
- OLOV leg risers (optional, for height adjustment)
- Heavy-duty mounting brackets
Screw the CAPITA legs into the underside of the EKBACKEN — space them in about 6″ from each corner so they sit stable. The 4″ CAPITA legs bring monitors up to a comfortable eye level for most people; go with 6″ if you’re taller than average.
Cut the EKBACKEN to match the width of your primary desk if it’s too wide. A hardware store will do this for a few dollars. Set it on the desk surface and check the depth — you want it to be shallower than your desk so there’s still room in front for your keyboard and mouse.
Secure it to the wall with brackets at the back to keep it from tipping forward. The result is a proper two-tier setup: monitors elevated on the upper level, keyboard and daily work materials on the lower. Your neck will thank you within the first week.
Wall-Mounted Pegboard

The SKADIS pegboard is one of IKEA’s genuinely great products and I say this as someone who has had a complex relationship with IKEA assembly instructions. It’s modular, it holds a lot, and the accessories are actually designed well.
What you’ll need:
- SKÅDIS pegboard — comes in small (22×22″, about $15) and large (30×22″, about $20)
- Assorted SKÅDIS accessories: shelf, containers, hooks, cable organizer (~$3-8 each)
- Stud finder, power drill, screws
Mount into studs. The pegboard itself isn’t super heavy but once you load it up with accessories and things, you want it secure. Two screws into studs is plenty for the small size; use four for the large.
My personal pegboard setup: one small shelf holds my bluetooth speaker and a candle. Two hooks hold my headphones and a small pouch for chargers. A little SKÅDIS container holds scissors, tape, and a few pens. One cable organizer routes my monitor cord so it doesn’t hang loose.
The thing I love about the SKÅDIS is that it’s completely rearrangeable. Nothing is permanent. I rearranged mine three times in the first month before landing on a layout I actually liked, and it took maybe ten minutes each time.
Fair warning: the accessories add up fast. Set a budget before you start shopping for them or you’ll walk out having spent $60 on pegboard add-ons for a $20 board. Not that I would know anything about that.
Rotating C-Clamp Bookshelf

This one is a little more involved but the payoff is real. If you have a BEKANT desk with the C-shaped metal leg frame, you have a perfect mounting point for a small rotating storage shelf that lives right next to your dominant hand.
What you’ll need:
- BEKANT desk with C-leg frame
- A small cabinet with removable door and shelves (check IKEA’s as-is section)
- Lazy Susan turntable (about $8-12)
- C-clamps (heavy duty, at least 2)
Remove the door from the small cabinet and pull out all but one shelf so you have an open compartment. Attach the lazy Susan to the cabinet’s bottom panel. Find a spot on the C-frame near the edge of the desk — you want the cabinet to sit just at desk height or slightly below. Use the C-clamps to attach the top of the cabinet to the frame.
Spin it and make sure it rotates freely without hitting the desk edge or your leg. Load it with whatever you reach for most often — in my case, that’s a notebook, my lip balm (I lose it constantly otherwise), and a small container of paper clips and binder clips.
It sounds oddly specific but having a rotating storage spot right at arm’s reach, off the main desk surface, is surprisingly satisfying to use.
Wall-Mounted Power Tower
Cable chaos is genuinely one of the worst things about a home office. I had a tangle behind my desk that I refused to look at for approximately eight months before doing something about it. This hack banishes it completely.
What you’ll need:
- SKADIS pegboard (the large one works best here)
- BROR shelving unit components
- Power strip(s) with long cords
- Cable hooks and SKADIS cable organizer accessories
- Velcro cable ties (not IKEA, just buy a pack of these separately — they’re a few dollars)
Mount the SKADIS securely on the wall beside or just behind your desk — somewhere you can easily reach but where cords won’t be in your way. Assemble BROR shelf sections as small vertical towers and attach them to the SKADIS system.
Mount a power strip to the back of each tower using adhesive strips or screws. Run your extension cord through the interior of the shelf vertically. Use the pegboard cable organizer hooks to route each individual device cable neatly, then secure with velcro ties.
Everything stays plugged in and charged. Nothing touches your desk surface. The whole setup takes maybe ninety minutes to do right and it’s one of those things that immediately makes your whole workspace feel calmer.
Suspended Computer Shelf


This is the most minimal version of a desk upgrade — just LACK shelves mounted above your work surface to hold monitors, a laptop stand, or a printer. Simple concept, but the execution matters.
What you’ll need:
- LACK wall shelves (the 43×10″ size is usually right, about $12 each)
- Heavy-duty metal L-brackets (not the IKEA ones — get sturdier aftermarket ones for electronics)
- Screws and stud finder
- Cable clips for cord management along the back
Mount into studs — monitors are heavy and the standard LACK shelf bracket isn’t built for that load on its own. Add the aftermarket L-brackets underneath for extra depth support. Once it’s up, run your monitor cords along the back of the shelf and clip them in place so they drop down cleanly behind your desk rather than dangling in front.
The shelf height matters here. Bottom of the monitor should be roughly at eye level when you’re sitting. Measure before drilling. Remounting a shelf 3 inches higher because you didn’t check first is an afternoon you don’t want to have.
Rotating Cube Storage

Another corner solution, and honestly the easiest one on this list. If you have a corner desk and you’re currently just piling things in that corner, this is a ten-minute fix.
What you’ll need:
- SAMLA plastic storage boxes with lids (the small ones, about $4-5 each)
- Lazy Susan turntable (again, about $8-12)
Place the lazy Susan on your desk corner. Stack two or three SAMLA boxes on top. Label the lids if you want to be very organized (I am not that person but maybe you are and that’s great). Spin to whatever you need.
It’s not glamorous but it works perfectly for things like receipts, spare cables, craft supplies, snacks. Corners are awkward to reach into, so the spinning motion is the whole point. Cheap, quick, genuinely useful.
Hanging Desk Drawers

This is one of those hacks that looks like it shouldn’t work but absolutely does. You’re basically creating drawers that hang from the underside of your desk rather than sitting on the floor or taking up desk space.
What you’ll need:
- Sunrise cabinet door hinges or similar heavy-duty hanging hardware
- ALEX drawer unit or RAST
- Screws
- A desk with at least a 1.5″ front overhang
Screw the hangers into the underside of your desk’s front edge — space them to match the width of your drawer unit. Slide the drawer unit onto the hangers. When you need it, pull it forward. When you don’t, push it back under the desk where it’s completely out of sight.
This works best for lighter storage — stationery, small notebooks, things you need occasionally but not constantly. Don’t try to load it with heavy files or it’ll put too much stress on the overhang. But for the right use case, it’s one of the neatest hacks on this list.
Rotating Desk Drawers

Last one, and it’s a good one for anyone with a desk that has open legroom space and nothing filling it.
The idea: add ALEX drawers on caster wheels so they roll under your desk and can be pulled out or swiveled as needed.
What you’ll need:
- ALEX drawer unit
- 4 swivel caster wheels with brakes (about $3-5 each at a hardware store)
- Power drill and screws
- Drawer slides (optional, for smooth gliding)
Flip the ALEX unit upside down. Screw a caster wheel into each corner — use screws that bite into the particle board without going through it (about 3/4″ long). Flip it back over and roll it under your desk.
The swivel casters mean you can pull it forward and rotate it to access whichever drawer you need without dragging the whole thing out. Lock the wheels when you want it to stay put. Unlock and roll it away when you need the legroom — like when Biscuit decides to nap under my desk, which is frequently.
The ALEX drawers are already well-organized on their own. On wheels they become genuinely excellent. This is the hack I’d recommend to anyone who has the floor space and needs serious under-desk storage.
Honestly, every single hack on this list came out of the same problem: I needed a real workspace and I didn’t have a real budget for one. The answer was always IKEA plus a little creativity plus the willingness to drill something into a wall and hope for the best. Some of these took an afternoon. Some took a weekend and a few choice words. But none of them cost more than $100 and every single one made my office better than it was before. Start with the one that solves your biggest annoyance right now — and go from there.