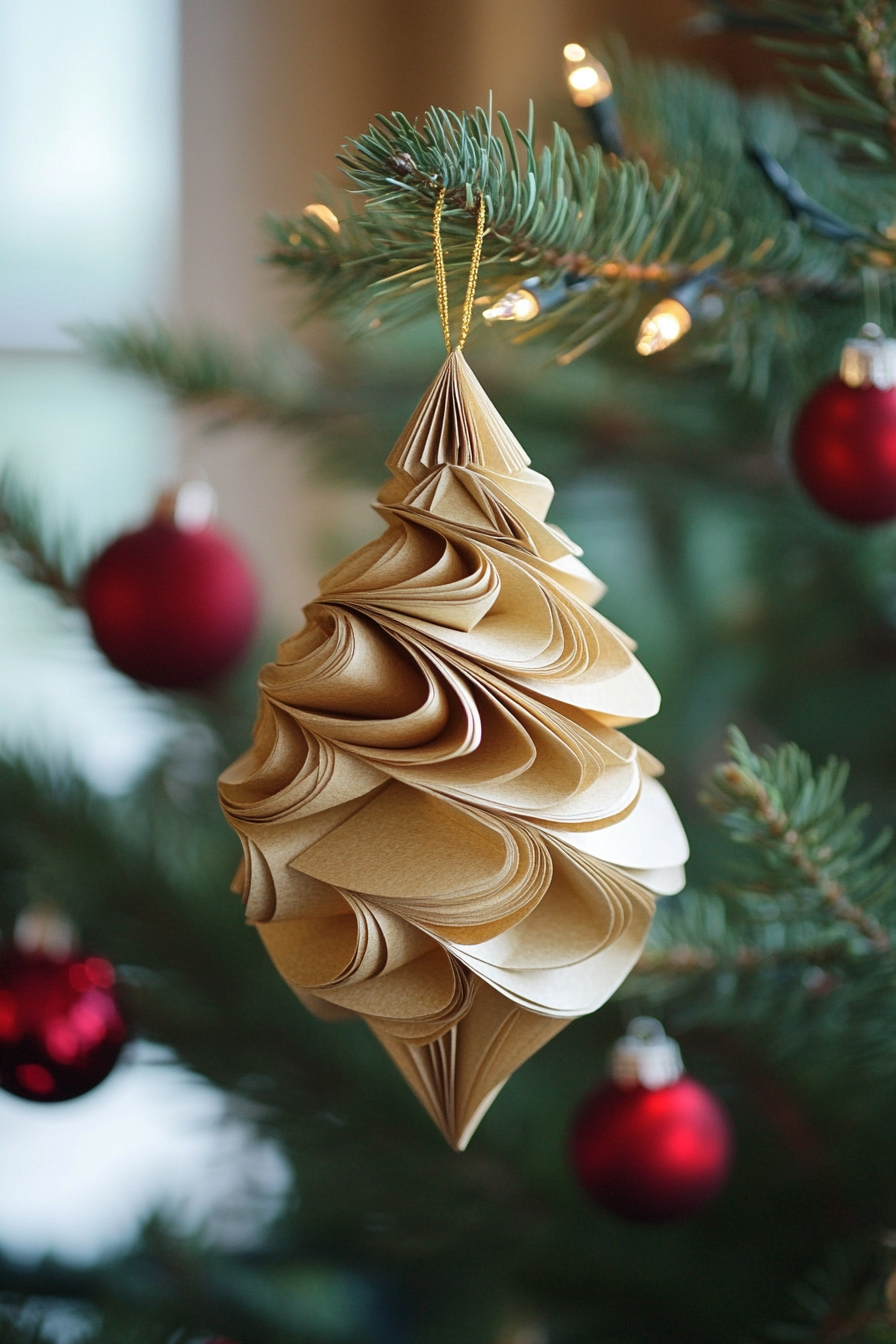
I made 47 DIY ornaments last December. Some were gorgeous. A few were complete disasters. And one — the folded paper swirl — stopped every single person who walked through my door. I’m going to show you exactly how I made it, plus 11 more projects that actually work, ranging from “done in 20 minutes” to “pour yourself a second coffee.” Further down I’ll show you the glittered citrus slices that cost me basically nothing and the salt dough recipe I’ve been using since my mom taught me it when I was eight. Keep scrolling — the good stuff is all here.
Here’s what nobody tells you about store-bought ornaments: they’re fine. But “fine” doesn’t make your kid tear up twenty years from now when they unwrap a little salt dough handprint. Handmade does that. And most of these projects are genuinely easier than you think — I say that as someone who once hot-glued her fingers together twice in one sitting.

Folded Paper Ornaments (The One Everyone Asks About)
I’m absolutely obsessed with this one and I need you to understand it looks way fancier than it is. Like, boutique-window fancy. The cream and gold marbled scrapbook paper I found at the craft store for $4 a pack genuinely looks like something that costs $18 on Etsy. People ask me where I bought it. I love that.
Biscuit knocked my first attempt off the table before the glue dried. Learned to work on a higher surface. Moving on.
What You’ll Need
- Decorative scrapbook paper or cardstock (cream, gold, marbled patterns are chef’s kiss)
- Scissors or a circle punch, about 3.5 inches in diameter
- Hot glue gun and glue sticks
- Gold thread or thin ribbon
- A pencil for tracing if you’re cutting by hand
- Optional: one small wooden bead for the bottom
Step 1: Cut Your Circles
You need 15 to 20 circles, all the same size. I use a 3.5-inch circle punch because my hand-cutting is not exactly Instagram-worthy and the punch makes every single one identical in about thirty seconds. If you only have scissors, trace around a drinking glass or a mason jar lid. Both work fine.
Mix two or three coordinating papers for the most interesting look. Solid gold alternating with a soft marbled print is my go-to.
Step 2: Create the Swirls
Take each circle and fold it in half. Then fold it in half again into a quarter circle. Here’s the part that matters: don’t press the fold flat. Leave it loose and slightly rounded. You want soft and swooshy, not crisp origami corners. This is what creates the dimensional swirl effect — tight folds will kill it.
Step 3: Prep Your Thread
Cut about 9 inches of gold thread and tie a loop at the top for hanging. Put a tiny dot of hot glue on that knot. Seriously. I skipped this once and the ornament slid off and shattered an hour after I hung it. Not repeating that.
Step 4: Start Layering
Work from the bottom up. Take your first folded circle, put a small dot of hot glue along its folded edge, and attach it to the thread so the curved layers face outward. It should look like a soft paper petal. That’s exactly what you want.
Step 5: Build the Shape
Keep gluing folded circles along the thread, rotating them slightly with each one. Overlap them generously. The rotation is what builds the spiral. Start with the folds a little more open at the bottom and gradually tighten them as you move up — this creates that tapered teardrop silhouette.
Step back every four or five pieces and look at it from a distance. Adjust spacing or angle before the glue sets. Takes ten extra seconds and saves you from a lopsided ornament at the end.
Step 6: Create the Top Point
As you near the top, make your folds tighter and smaller. The last two or three circles should be folded quite snug. Secure the final piece with a generous dab of glue and hold it for a few seconds until it sets.
Step 7: Optional Finishing Touch
Glue a small wooden bead to the very bottom. It hides the thread end and gives the ornament that polished, finished look that makes people think you’re way more skilled than the project requires. Totally worth the extra thirty seconds.
Popcorn and Cranberry Garland

Okay this one is not technically an ornament but it belongs on this list because it might be my favorite thing on the whole tree. It smells like a holiday movie, it costs almost nothing, and stringing it while watching a Christmas special is genuinely one of the coziest activities I know.
Fair warning: about 30% of the popcorn will be eaten before it ever touches the needle. Budget accordingly.
Pop roughly 2 cups of kernels, which gives you 6 to 8 cups of popped corn. Thread a sturdy needle with about 15 feet of fishing line (thicker than thread and much less likely to snap mid-strand). Tie a knot at the end.
Alternate stringing popcorn and fresh cranberries, about 2 to 3 pieces of each before switching. Keep them close together — you want it lush, not sparse. You can also add dried orange slices, cinnamon sticks tied in at intervals, or a few whole cloves for extra scent. Just make sure anything you add has a hole or a gap the needle can pass through without shredding your thread.
When the strand is full, wrap it around the tree in slow lazy loops and secure with ornament hooks if it keeps slipping. Tie off both ends. The citrus smell mixed with cinnamon is honestly better than any candle I own, and that’s a hill I’ll die on.
One practical note: it will dry out and get a little brittle after a week or two. I usually make a fresh batch mid-December. Takes maybe 45 minutes with company and zero minutes of that is boring.
Painted Wood Ornaments
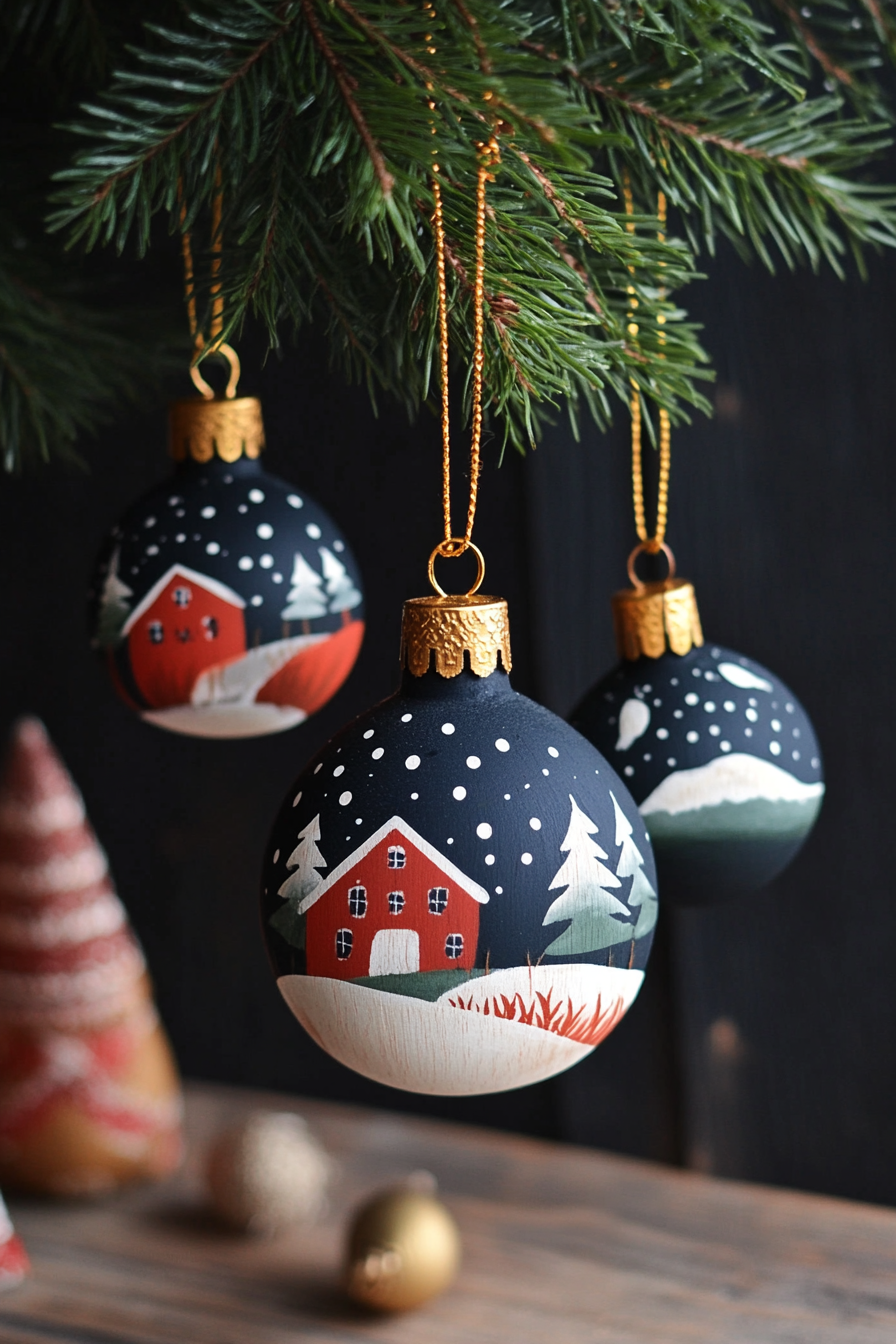
This is the project I give to people who say they “aren’t crafty.” Because painters tape does literally all the hard work for you.
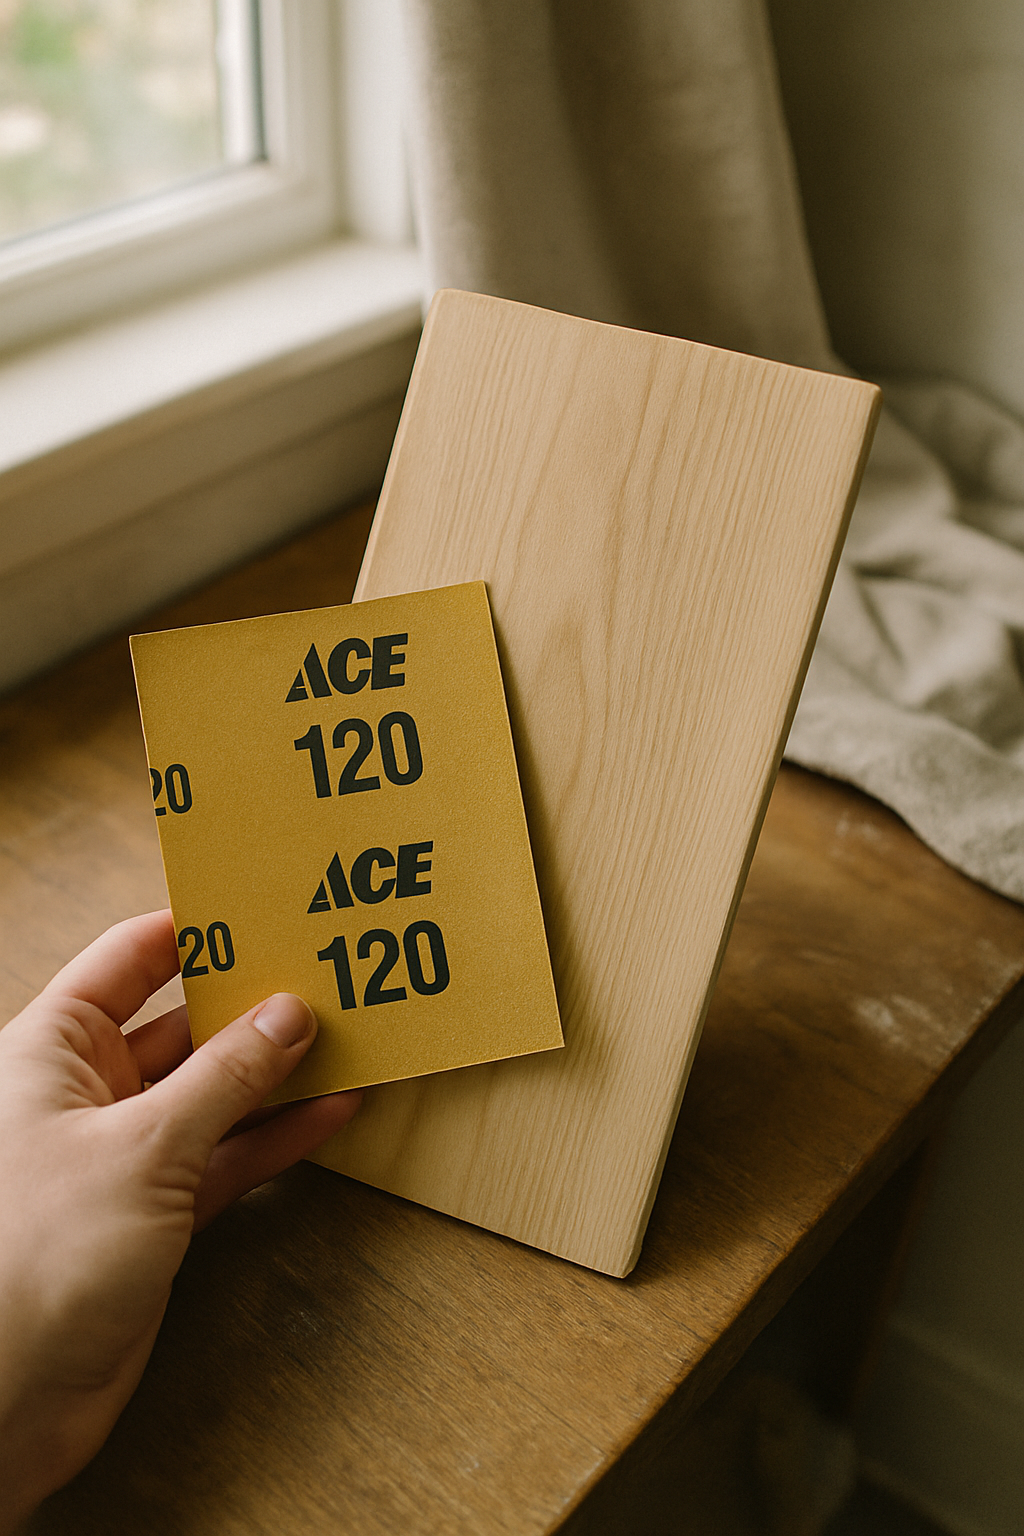
Grab plain wood cutouts from the craft store — Michaels usually has bags of assorted shapes for around $3 to $5. Stars, circles, little trees, hearts. Or go outside and collect actual fallen branches and cut them into discs (a handsaw and about ten minutes). Sand lightly with 120-grit if the surface feels rough.
Apply painter’s tape in whatever pattern you want. Diagonal stripes. A chevron. Random geometric blocks. The tape is your stencil, and it does not require any artistic skill whatsoever. Press the edges down firmly so paint doesn’t bleed underneath.
Paint with acrylic craft paint in holiday colors — I usually do deep red, cream, and gold because that’s my whole color palette and I have commitment issues about changing it. Let it dry completely, then peel the tape off slowly. That reveal moment is unreasonably satisfying every single time.
Finish with a coat of Mod Podge to seal everything, tie on a ribbon hanger, and you’re done. These take about an hour including dry time. They also make genuinely good gifts — I’ve given sets of six tied together with twine to neighbors and gotten texts saying they were the favorite gift of the season. I believe them.
Salt Dough Ornaments

My mom made these with me when I was little and I still have one from 1995 hanging on my tree. A thumbprint in salt dough with my name written in marker. It’s chipped and slightly brown and I would never in a million years throw it away.
That’s the thing about salt dough. It’s not about looking perfect. It’s about lasting.
Here’s the recipe:
- 2 cups all-purpose flour
- 1 cup salt
- 1 cup warm water
- Food coloring, optional
- A few drops of essential oil (cinnamon or peppermint are my favorites), optional
Mix the flour and salt in a large bowl first, then slowly add the warm water and stir until a dough comes together. Turn it out onto a floured surface and knead for about five minutes until smooth. If it’s sticky, add flour a tablespoon at a time. If it’s cracking, add water the same way.
For colored dough, knead in food coloring a few drops at a time. The color deepens a little as it dries, so go lighter than you think you need. Adding essential oil at this stage makes the ornaments smell amazing — the cinnamon oil especially gives them a warm spicy scent that lingers for months.
Roll to about 1/4 inch thick. Cut shapes with cookie cutters. Use a drinking straw to punch a hole near the top before baking — that’s your hanger hole, and if you forget it you’ll be sad later (learned this). Place on a parchment-lined baking sheet.
Bake at 200°F for 2 to 3 hours, flipping halfway through. They’re done when they sound hollow when you tap them. Turn the oven off and leave them inside to cool completely — pulling them out too fast can cause cracking.
Decorate with acrylic paint, glitter, Sharpie details, pressed flowers, small beads. Or leave them plain with just a painted name and a year. Thread ribbon through the hole and hang. They will honestly last for decades if you keep them dry.
Felt Ornament Kits
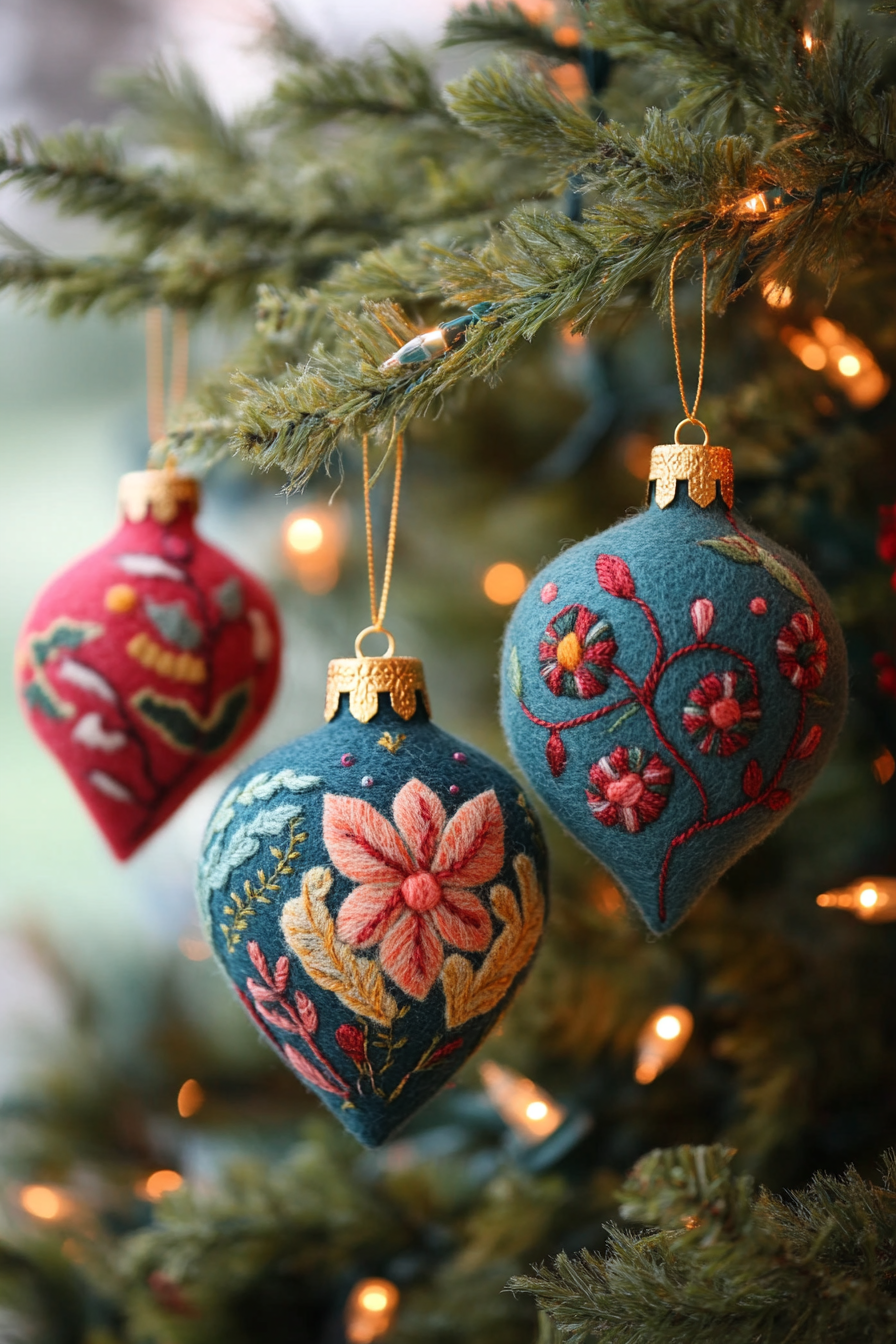
I know, I know — a kit is not exactly “from scratch.” But hear me out. These are actually perfect for doing with kids, or for someone who wants to make something handmade but doesn’t want to source fifteen separate materials. The kits come with everything pre-cut and included, usually for $8 to $15, and the finished ornaments are genuinely adorable.
Look for kits that make gingerbread men, stockings, snowflakes, little trees, or stars. The better ones include pre-cut felt pieces in multiple colors, embroidery thread, stuffing, and simple illustrated instructions.
Assembly usually works like this: punch out or separate the pre-cut pieces, layer them according to the guide, and use the tabs or slots to connect them without any sewing. Stuff as you go so the shapes end up plump and dimensional instead of flat. Use the included thread for decorative embroidery details — even messy embroidery looks charming on felt, which is why I love this material.
An afternoon with a kit, a Christmas playlist, and a mug of something hot can produce six or eight finished ornaments. They’re also a nice thing to make with older kids who want to give handmade gifts but need some structure. My neighbor’s daughter made a set for her teacher’s tree last year and it was the sweetest thing.
Beaded Ornaments
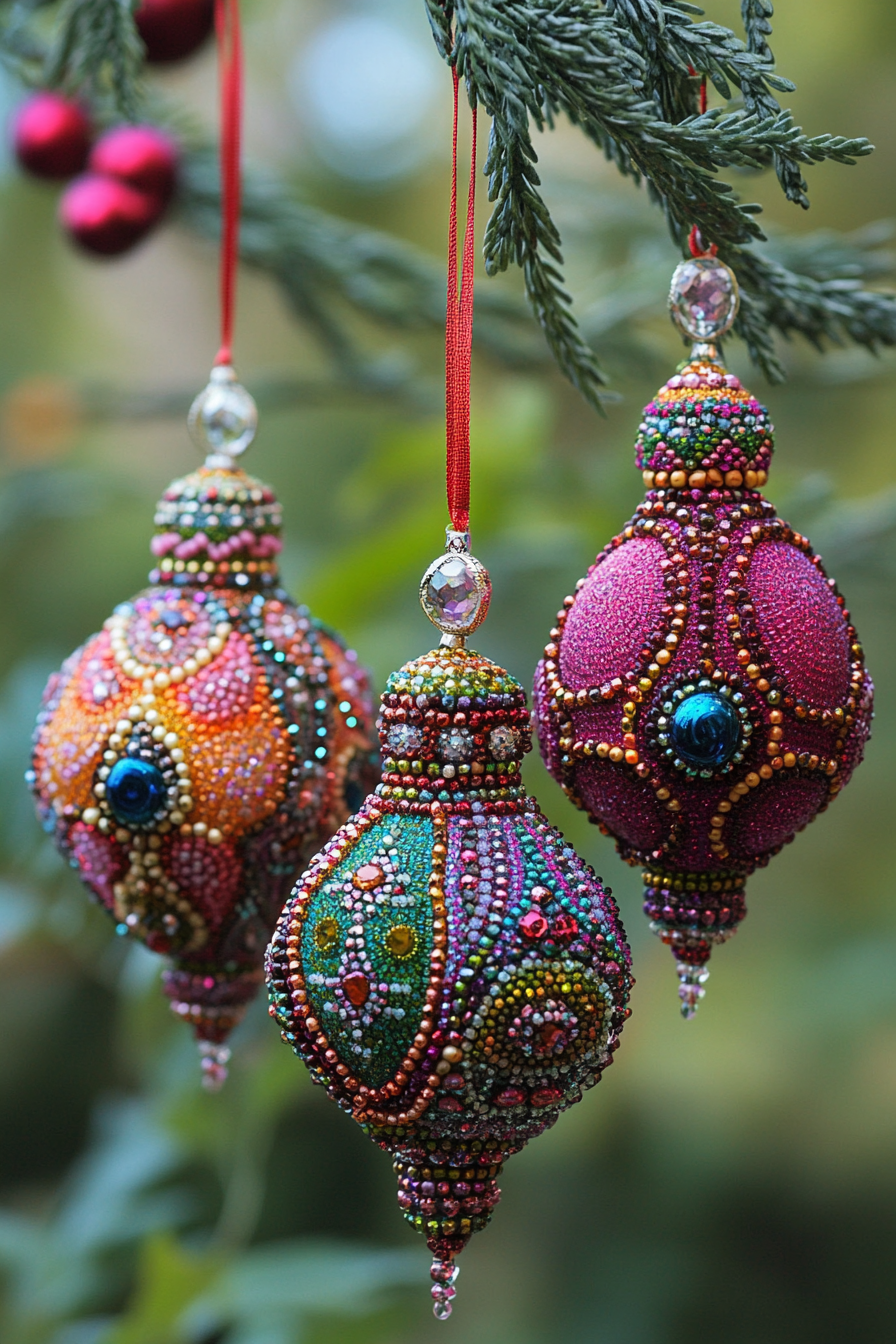
These are for when you want something that genuinely glitters. Not glitter-glittery — more like “heirloom jewelry for your tree” glittery. The beads catch the light and throw it around the room and I am very much here for that.
You need clear plastic ball ornaments that open into two halves — most craft stores sell these in packs. You also need beading wire (the thin flexible kind, not craft wire), head pins, and an assortment of beads. I like mixing round glass beads with small teardrop crystals and a few metallic seed beads for texture.
First, apply a thin line of tacky glue around the seam of the ornament, close the two halves together, and let it dry. This keeps it from popping open while you work.
Cut several 15-inch lengths of beading wire. String beads in whatever pattern you like — alternating colors, random, gradient, all one color. Every five or six beads, thread through a head pin trimmed to about 1.5 inches and fold it back into the strand. This anchors the beads so they don’t all slide to one end.
Wrap finished beaded strands around the outside of the ornament ball, tucking the wire ends under previous strands to secure. Keep adding strands until the ornament is covered to your liking. Trim any sharp wire ends on the inside before fully closing it up. Add a ribbon or wire hanger at the top.
These take a little patience but the result is genuinely stunning on the tree. Especially in the evening with the lights on. I made four of them two years ago and they’re still my most-reached-for ornaments when I unpack the boxes.
Glittered Dried Citrus Slices
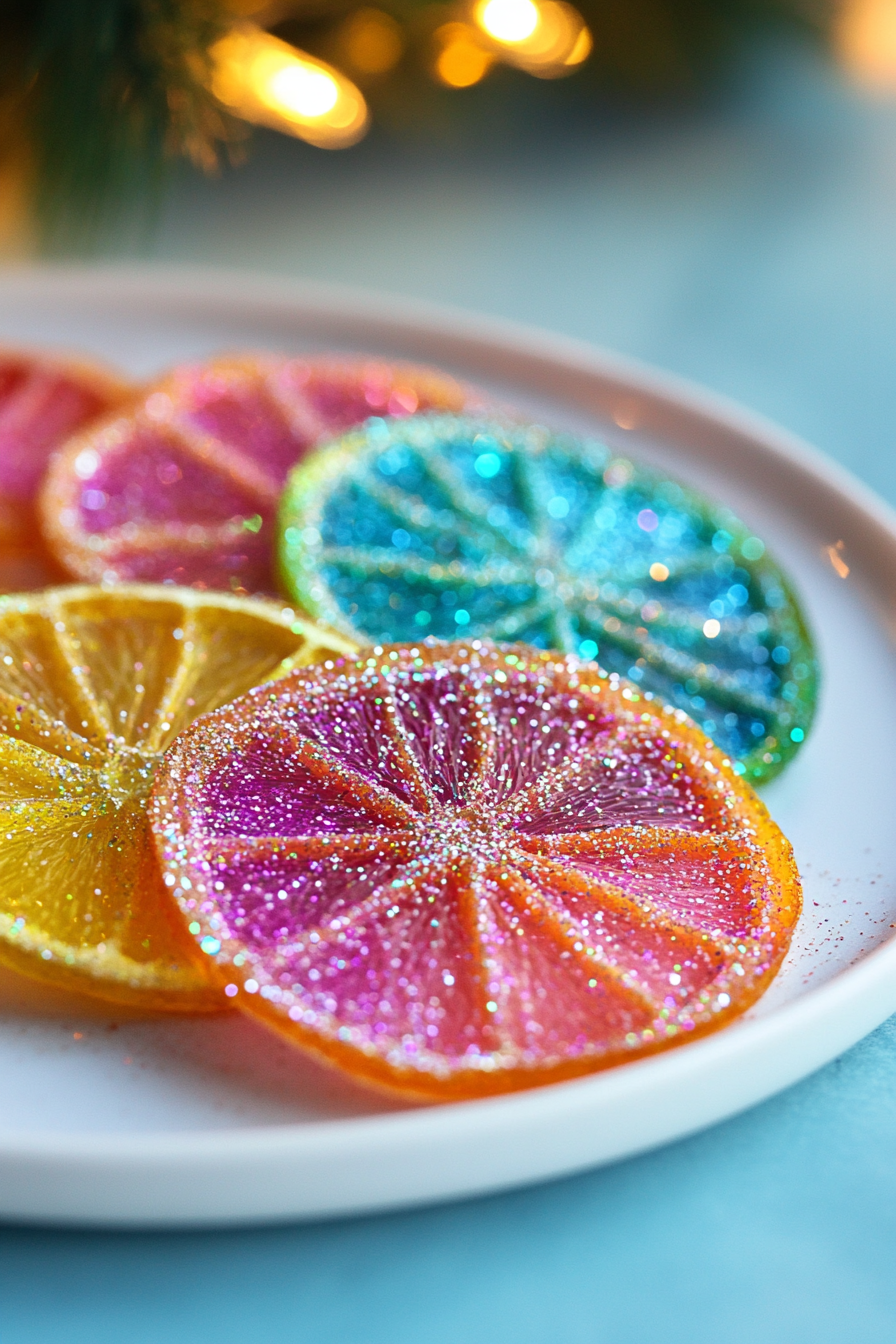
These might be my single favorite ornament on this whole list. They cost almost nothing, they look like something out of a Scandinavian design magazine, and the process of making them makes your whole house smell like a warm holiday candle for hours.
Slice oranges, lemons, or a mix of both into rounds about 1/4 to 1/2 inch thick. Lay them flat on a cooling rack set over a baking sheet so air can circulate underneath. Oven at its lowest setting, around 175°F. Check them every hour or so and flip once. They need 4 to 6 hours total depending on how thick you cut them and how juicy the fruit was.
You’ll know they’re done when they feel completely papery and dry, not tacky or flexible. Let them cool fully on the rack.
Now, brush a thin layer of Mod Podge or tacky glue over the top surface and immediately sprinkle glitter generously. Gold glitter on orange slices is the combination I keep coming back to — it’s warm and rich and beautiful. Let it sit two or three minutes, then gently shake off the excess over a piece of paper (fold the paper into a funnel and pour the extra glitter back into its container).
Thread a length of thin ribbon or twine through the slice near the top — a large needle or small skewer makes the hole easily. Tie a loop for hanging.
Group several together on a branch for the most impact. Dried citrus holds its shape for years if stored carefully. I still have two from three seasons ago and they’re perfect.
Cinnamon Stick Ornaments

These take maybe ten minutes. I’m including them because sometimes you need a project that doesn’t require a hot glue gun, planning, or any particular skill, and these deliver.
Buy a bag of cinnamon sticks from the grocery store — the big 4-ounce jar from the spice aisle is usually around $3 and gives you plenty. Cut ribbon into 5 to 6 inch pieces in a few different colors and patterns. Plaid ribbon, solid red, cream with a gold edge — mix them up.
Bundle 4 or 5 cinnamon sticks together (you can use different lengths for a more organic look), slide the ribbon around the middle, and tie a tight double knot. Leave the ribbon ends long enough to form a hanging loop. Fluff the sticks out into a loose fan or spray shape.
That’s it. They smell incredible. Hung near a warm light on the tree the scent intensifies slightly and it is genuinely one of the best smells in a Christmas home. Make a dozen in an evening, keep half for your tree, and tie the rest with a small tag for neighbors and teachers. Extremely well-received as a small gift, I promise.
Photo Ornaments

These are the ones that make people cry at the tree every year. I mean that in the best possible way.
Print your favorite photos small — 1 to 2 inches works well for most ornament sizes. Print on regular photo paper at a drugstore or at home. Cut them into circles or ovals with scissors or a circle punch.
For glass ball ornaments, remove the metal cap, slide the photo inside facing outward, and use a pencil or skewer to position it against the glass. Add a small square of Mod Podge-coated tissue paper behind the photo to help it press flat against the inside of the ball. Replace the cap.
For wood ornament blanks, Mod Podge the photo directly to the surface, smooth out bubbles with your finger, and seal with another layer of Mod Podge on top once dry.
Decorate around the photo with ribbon, small beads, a sprig of dried eucalyptus, a tiny bow. Whatever feels right for the photo inside. A picture of your dog on the first Christmas you had him deserves a little burlap ribbon and a charm. You know what I’m saying.
Have your kids draw a small holiday picture to seal inside one too. A six-year-old’s crayon Christmas tree inside a glass ball ornament is heartbreakingly sweet to unpack fifteen years later.
Pinecone Ornaments
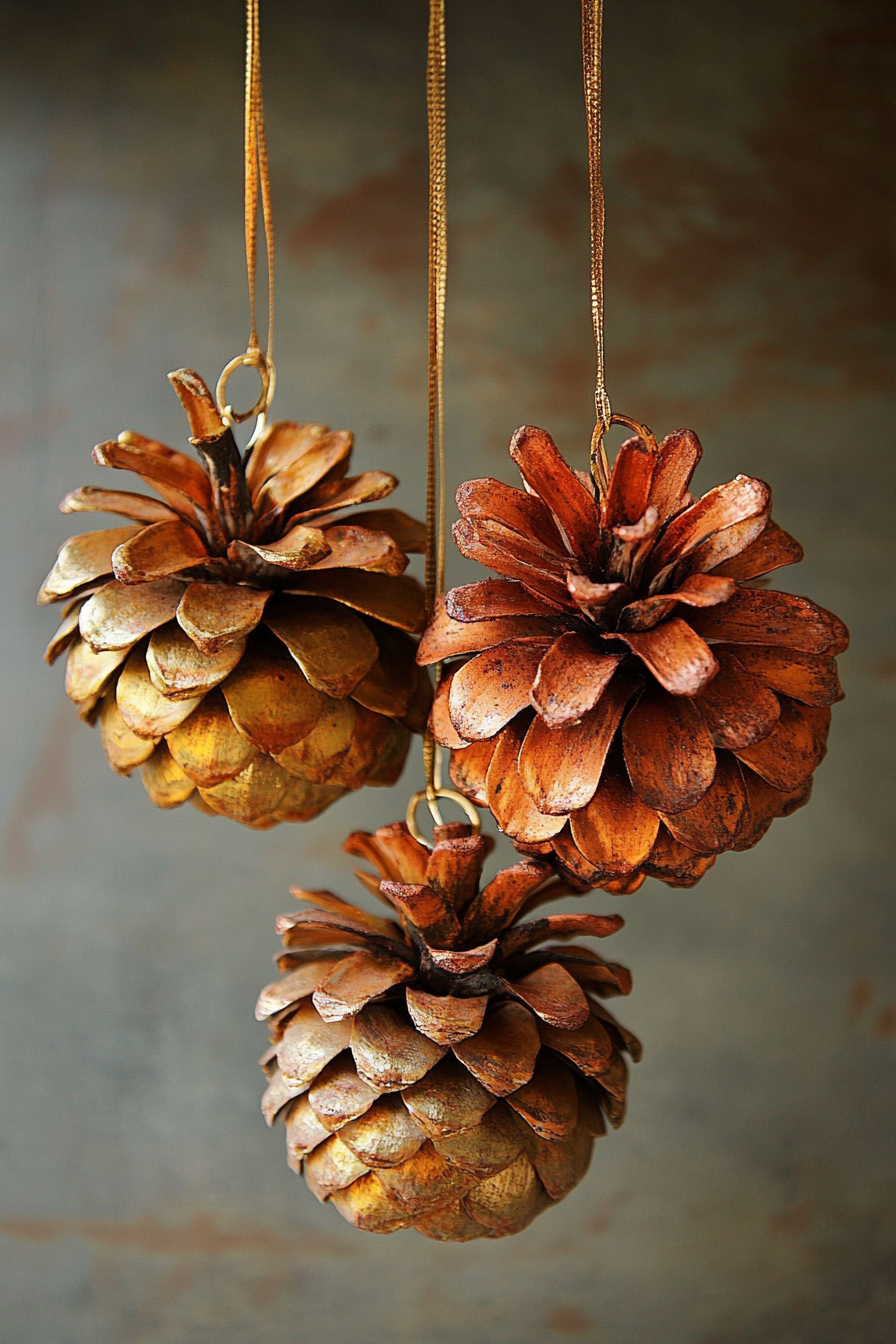
Free materials from outside plus ten minutes of decorating. That’s the whole pitch and it’s a good one.
Collect pinecones in varied sizes — smaller ones, around 2 to 3 inches, work best for tree ornaments. Look for tightly closed ones with intact scales. If you want to clean and dry them fully, spread them on a baking sheet at 200°F for about 30 minutes. This also kills any insects that might be hiding in there, which, yes, that’s a thing.
Decorating options: metallic gold or silver spray paint gives them an elegant look in about five minutes. Or brush them with Mod Podge and roll them in glitter. Or dip just the tips of the scales in white paint for a frosted snow effect. That last one is my favorite — looks like they’ve just come in from outside.
Tie ribbon around the base in a bow and attach a loop of twine at the top for hanging. Or glue on a few small red berries, a tiny sprig of preserved greenery, a bit of plaid ribbon. They work on the tree but also look beautiful grouped in a bowl on the coffee table or lined up on the mantel.
Biscuit has knocked my mantel pinecone arrangement over twice this season. They survived both incidents, which tells you something about their durability.
Thumbprint Cookie Ornaments


Okay these are edible, which technically means they have a limited run as decorations. But they’re so fun to make — especially with kids — and they look adorable on the tree for however long they last before someone eats them.
Make a simple butter cookie dough (any basic recipe works — 1 cup butter, 1/2 cup sugar, 2 cups flour, 1 teaspoon vanilla). Chill it for 30 minutes. Roll to 1/4 inch thick and cut rounds with a small glass or cookie cutter, about 2 inches across. Press your thumb firmly into the center of each one to make the well. Punch a small hole near the top with a straw or skewer before baking — that’s your ribbon hole, don’t forget it.
Bake at 350°F for about 10 minutes until just barely set at the edges. They should be pale, not golden. Cool completely before decorating.
Fill the thumbprint well with royal icing, piping gel, or a spoonful of jam (strawberry or raspberry is gorgeous). Top with sprinkles, crushed candy cane, mini chocolate chips, or whatever feels festive. Let the icing set fully before threading ribbon through the hole.
Hang them on the tree, give them to neighbors, or package six in a cellophane bag tied with ribbon as a gift. They last about a week at room temperature — though in my house they’re gone in three days, tree or not.
Clothespin Snowflake Ornaments
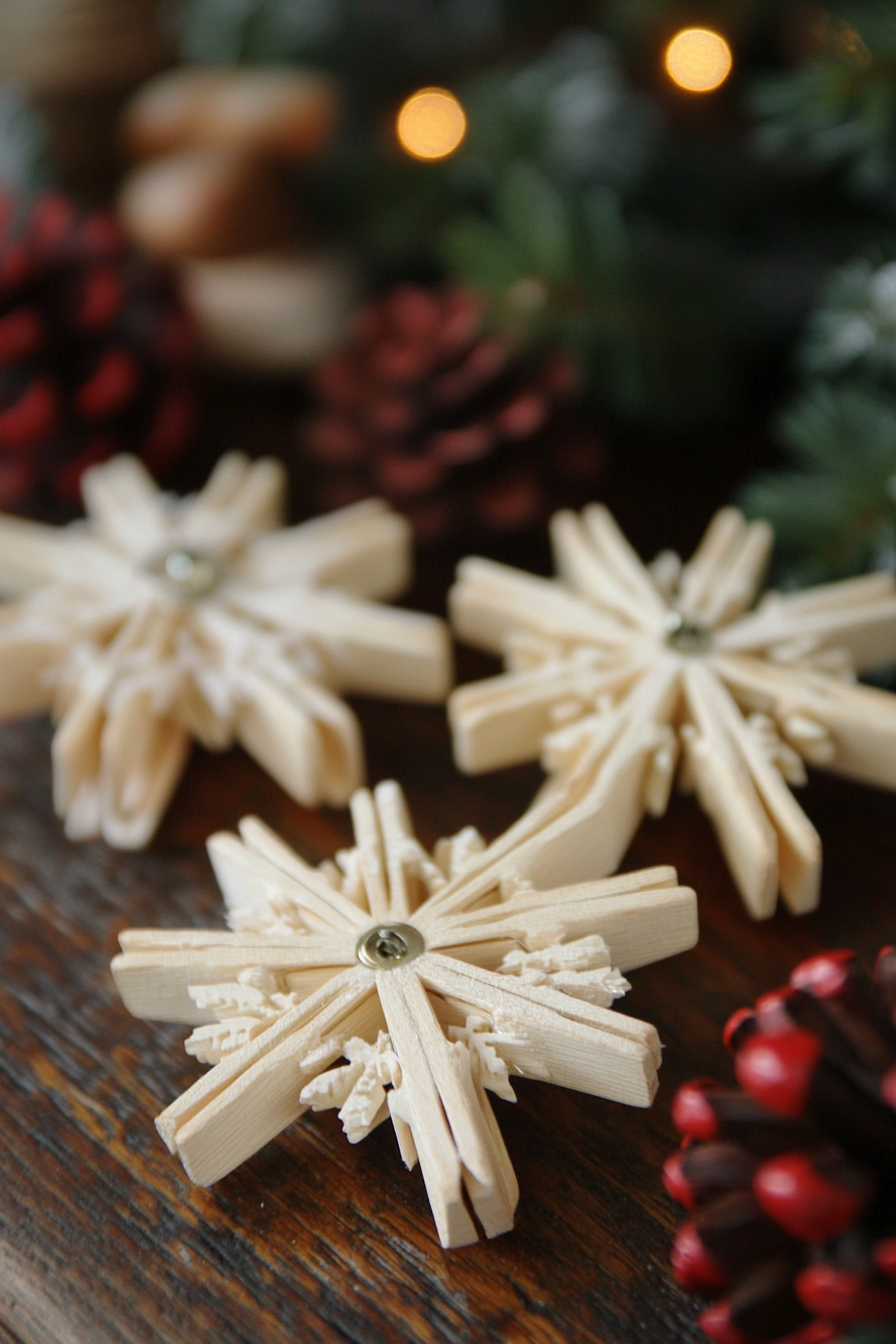
This one surprised me. I assumed it would look craft-fair-circa-2003 and I was wrong. Done in white paint with a little glitter, they actually look really pretty — crisp and wintry and a little bit Nordic.
You need the old-fashioned rounded wooden clothespins, not the spring-clip kind. Paint both sides white with acrylic craft paint. Two coats, let dry fully between them.
Once dry, apply a thin coat of Mod Podge and immediately press fine white or silver glitter over the surface. Shake off excess, let dry. The glitter catches light in a way that’s subtle and genuinely pretty rather than tacky.
For the snowflake shape, glue three painted clothespins together at their centers in a star or asterisk arrangement — six “arms” total. Hold firmly for a minute while the hot glue sets. Attach a ribbon loop at the top.
You can also crisscross strips of narrow ribbon across the front of a single clothespin before the glitter step, which adds texture and color. White with a tiny bit of pale blue ribbon is a combination I love for these.
Make a whole cluster of them — they’re fast once you get a rhythm going. A bowl of clothespin snowflakes on the entry table makes a sweet little scene, and they cost maybe $2 total to make a dozen.
Glass Jar Luminaries
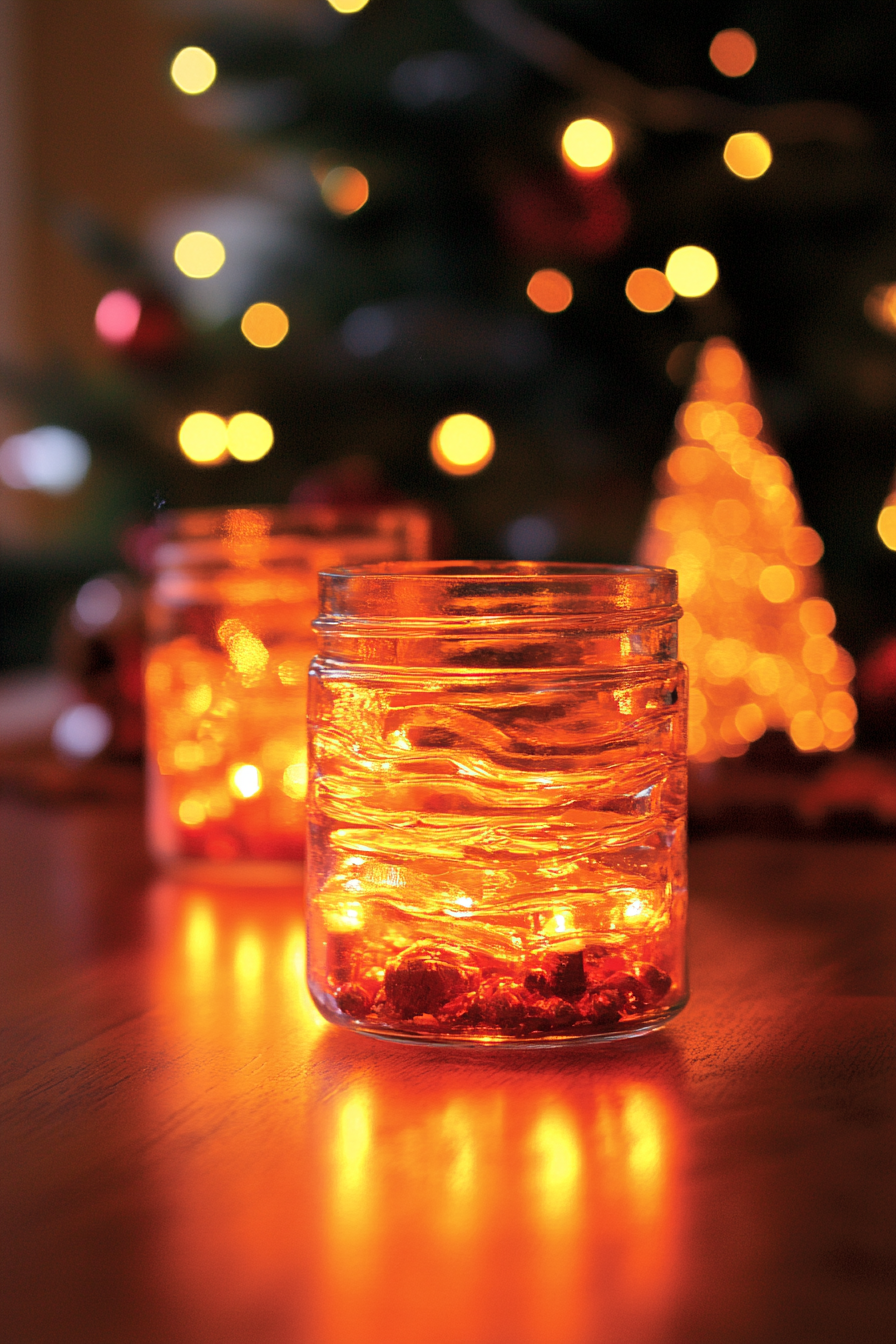
These aren’t technically ornaments but they’re so easy and so beautiful that I have to include them. I have a running collection of mason jars and old pasta sauce jars that I’ve been slowly converting into luminaries for three years. There’s a set of six on my mantel right now and the light they throw in the evening is incredibly warm and good.
Gather glass jars in whatever sizes you have. Remove labels with a soak in warm soapy water. Dry completely.
Decoration ideas, because this is where you can really make them your own: wrap twine around the neck and tie in a bow. Apply Mod Podge in patches and press torn tissue paper onto the glass for a stained-glass effect. Brush on a wash of white acrylic paint diluted with water for a frosted look. Tie a sprig of dried eucalyptus or rosemary around the jar with kitchen twine.
Drop a flameless LED tealight inside — please, not real candles in glass jars unattended, it stresses me out. These little battery tealights are usually $5 or $6 for a pack of twelve and they flicker in a way that looks almost real.
Arrange them in groups of odd numbers on the mantel, on window sills, along a staircase. The glow they give off in a dark room on a cold December evening is the kind of thing that makes a house feel like exactly where you want to be.
And honestly, that’s what all of this is about. Not the ornaments themselves. It’s the evenings spent making them, the mess on the kitchen table, the dog covered in glitter (Biscuit looked genuinely festive for a week after the citrus slice night and I have no regrets). Hang something handmade on your tree this year and see how it feels when you unpack it next December. I promise it’ll be the first one you go looking for.